Select your Ecosystem and go to Objects using the left-side menu.
Click Add new Object and select Gateway.
Fill in the following fields:
Name: the name of the gateway
Category: IoT
vGateway: select Gateway in the upper right corner
DHCP/Static: Select DHCP
vGateway Local IP: IP address of Raspberry Pi device in your LAN, i.e 192.168.200.1/24
Local Networks: your local network addresses that will be routed through this gateway
Save the created Gateway by pressing Add.
Add a security policy that will allow communication from the Gateway device to the Internet.
Commit pending changes (located at top of the screen).
Tip
To simplify testing, add the IP addresses of every interface connected to your gateway as Local Networks (you can use /32 prefix for public interface). This will allow testing connectivity from the gateway through Acreto using Ping, Traceroute, or similar tools.
Note
To successfully test your connectivity, you also need to create a security policy that will allow traffic to go through your device.
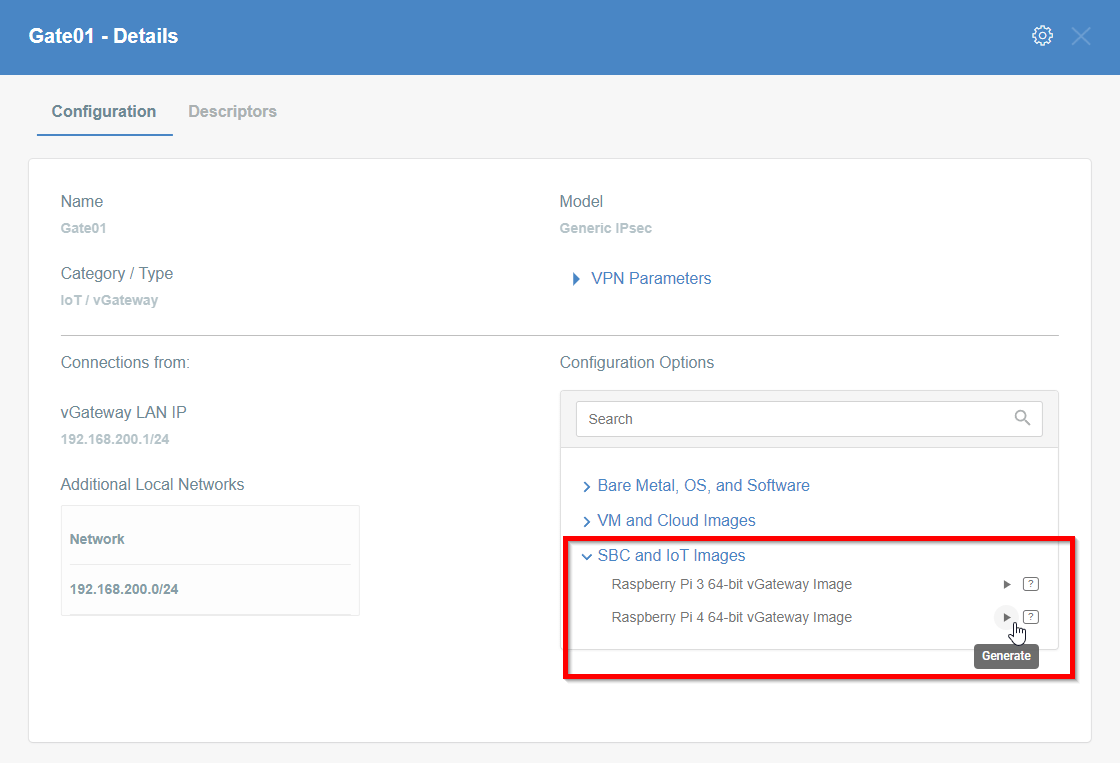
Generate Raspberry Pi vGateway Image
To proceed with this step, you should have at least one Gateway configured as vGateway in your Ecosystem. From the left-side menu, select Objects > Gateways to display the list of existing gateways.
To generate a Raspberry Pi configuration image, you must:
Click on the vGateway name on the vGateway panel. The details panel will then appear.
On the right side of the gateway details panel, click on SBC and IoT Images to view a list of image generation options.
Click the play icon for the right version of the device.
The generation of the image may take a while, please be patient.
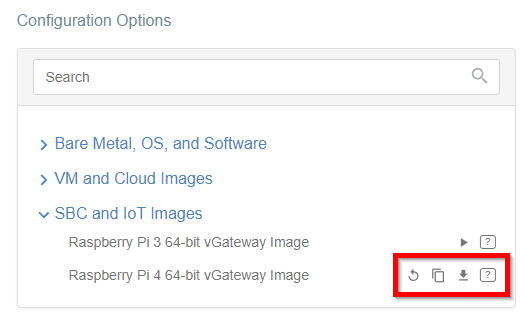
When the image is ready, you may download it or copy the URL & save it on your PC.
Image Installation
Linux
To proceed with this step, you must have an image file generated by Acreto or a URL to the image for your vGateway.
To install the image, you must first proceed with flashing the SD card.
Download the write_image.sh script.
Click on the button and save the script in your home directory:
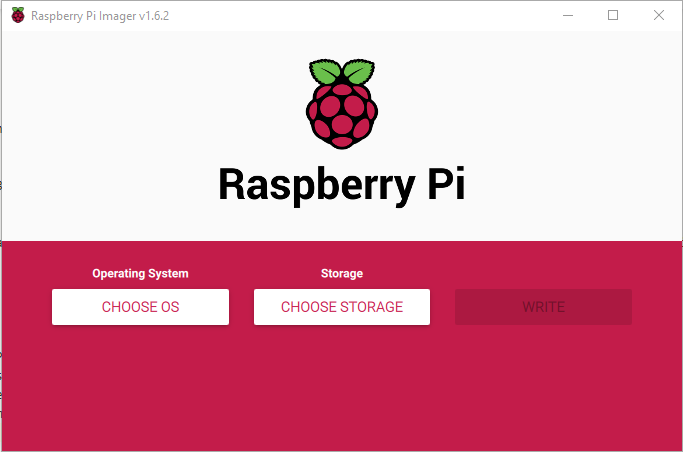
If Raspberry Pi Imager doesn’t start after installation, run it manually. You should see the window presented below:
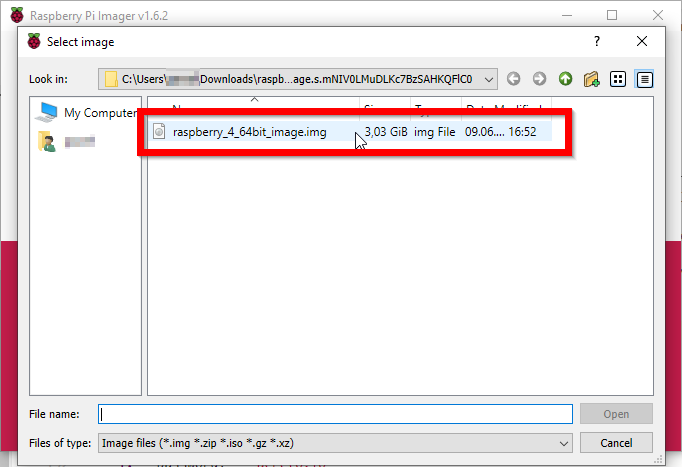
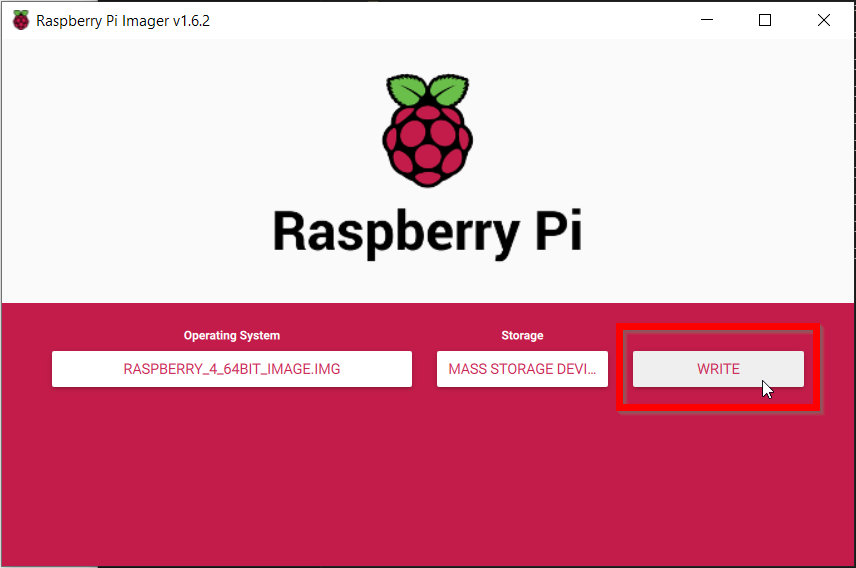
Click on the Choose OS button and select the Use custom option.
Select a downloaded image using the explorer window.
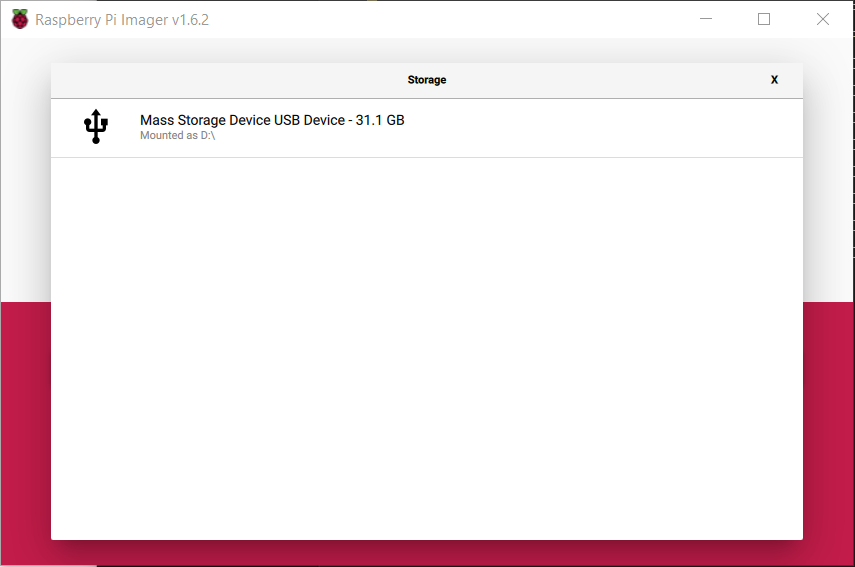
Click on the Select Storage button and choose your SD Card.
Double-check the settings and if they’re OK, click on the Write button.
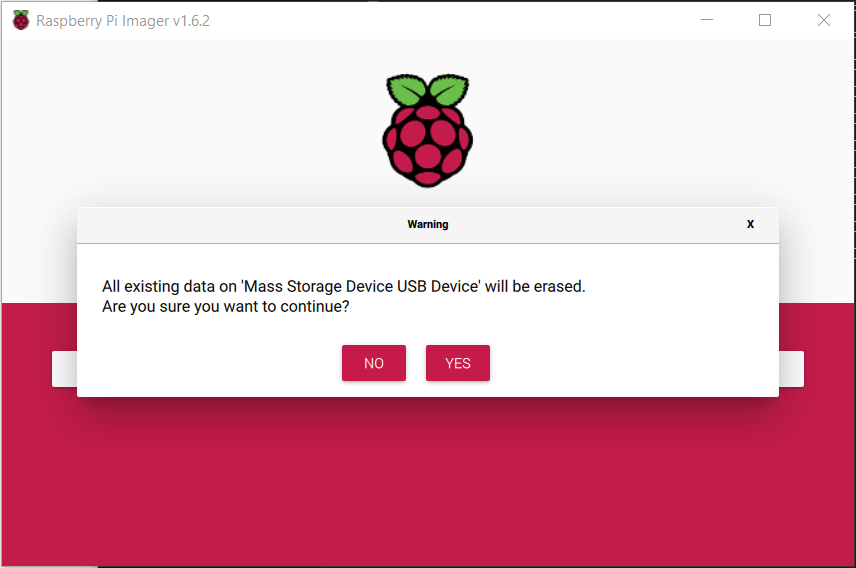
The writer will warn you about erasing the current content of the SD Card, click on the YES button to continue.
Now the Writing process will start, it may take a few minutes.
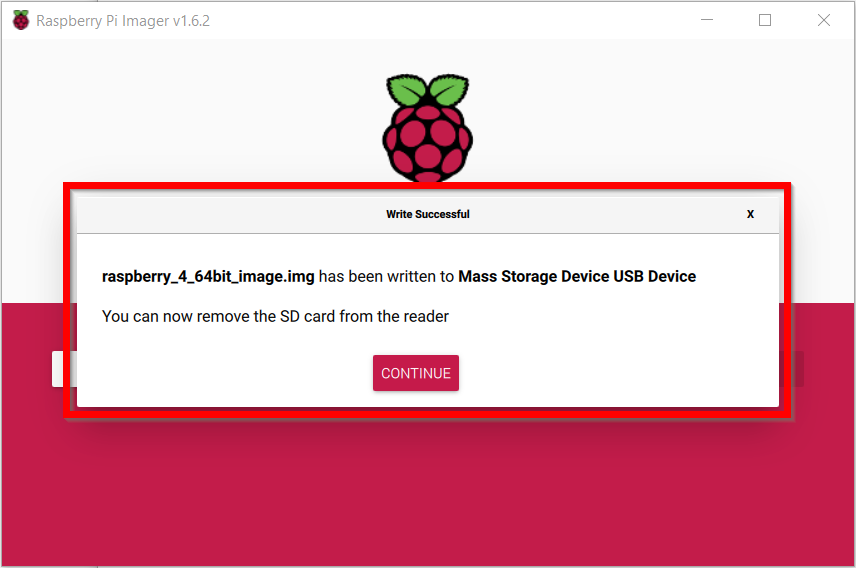
When writing ends, you should see the below information.
Once finished, take the SD card from your computer and plug it into your device.
Restart the Raspberry device and wait until it boots from the SD Card.
From the left menu choose the Logs > Gateways option.
As one of the last inputs, you should see information about the established connection from your Gateway.
More information about checking the connectivity can be found in the Connectivity Check article, where a dedicated tool is available.
List of Supported USB Ethernet Adapters to Use for LAN
By default, the Raspberry Pi has only one Ethernet adapter. But to connect your network, you’ll need an additional Ethernet adapter.
Acreto recommends using a USB Ethernet dongle facing the LAN network.
Show the list of supported USB Ethernet devices
USB Ethernet Adapters Officially Supported by Acreto
TP-Link
TP-Link UE300 USB 3.0 to Gigabit Ethernet Network Adapter.
Works out of the box on Raspbian Wheezy on a Pi 2 Model B.
No external power source or USB hub needed.
Pi is powered by a 2.5 amp power supply.
Other Raspberry Pi Supported USB Ethernet Adapters
Other devices:
Warning!
Please note that this is a list of USB Ethernet adapters confirmed to work by the Raspberry Pi Community. None of the devices below were tested by Acreto.
ADMtek
ADM8511 Pegasus II Ethernet, full-speed, idVendor=07a6, idProduct=8511:
Works out of the box. No external power source needed.
AVM
FRITZ!Box WLAN 3030 USB Ethernet Adapter: Works out of the box.
No external power source needed.
ASUS
USB 2.0 to Fast Ethernet Adapter (ASIX AX88772B)
USB Ethernet Adapter: As distributed with Zenbook Ultrabooks.
Works out of the box.
No external power source needed.
Cable Matters
USB 3.0 to Gigabit Ethernet Adapter (ASIX AX88179) USB Ethernet Adapter.
NOTE: Since Raspbian 3.8.y kernel does not include a driver for this hardware, you must build a new kernel module from the source code provided by ASIX here.
Easy to follow instructions on how to download the kernel source code and symbol files can be found in the second posting here, including how to compile the module.
For Raspbian 3.9.+ the driver is already included in the distribution.
Wintech
USB 2.0 LanCard Model: LAU-15 (CK0049C) using the mcs7830 driver.
Probably needs more than 100 mA current. [1]
LogiLink
USB 2.0 UA0144: AX88772 chipset using the ASIX kernel driver.
Does not work without a powered USB hub. (idVendor=0b95, idProduct=772b)
LogiLink Fast EN USB 2.0 to RJ45 Adapter: Test on Wheezy-Raspian
(2012-08-16) without USB Hub will be confirmed
lsusb output: Bus 001 Device 004: ID 9710:7830 MosChip
Semiconductor MCS7830 10/100 Mbps Ethernet adapter
BE CAREFUL: There exists a copied Chinese version without the
Logilink logo using the Kontron DM9601-chip (see “Problem Ethernet
adapters” below). This only supports USB1.1 and isn’t well-supported in
Linux. If you get a model without the Logilink logo and the model number
JP1082, it’s a fake.
Apple
Apple USB Ethernet Adapter using ASIX kernel driver.
Works out of the box (driver present since kernel 2.6.32).
Doing OK using Apple USB charger and Pi’s own USB port.
USB register states that it draws max. 250 mA.
Belkin
USB 2.0 Ethernet Adapter (F4U047)
Works out of the box without any needed setup.
No powered USB hub needed, tested on Raspberry Pi A+.
Edimax
Edimax EU-4208 USB2.0 Fast Ethernet Adapter
(idVendor=0b95, idProduct=772b)
Works out of the box.
Requires own power supply (from powered USB hub).
Edimax EU-4230 USB2.0 Fast Ethernet Adapter with 3 port USB hub
Works out of the box.
Requires own power source.
D-Link
D-Link DUB-E100 Fast Ethernet USB 2.0 Adapter
Works out of the box.
Requires own power supply (from powered USB hub).
LinkSys
LinkSys - USB200M - Compact USB 2.0 10/100 Network Adapter
Raspbian recognizes it automatically.
Tested on a powered USB hub.
Linksys - USB300M - Compact USB 2.0 10/100 Network Adapter
Works out of the box.
Doesn’t require powered hub when powering Pi using MicroUSB supply
rated for 0.7A output.
With older kernels the adapter works about 10 minutes without a problem,
but after that, the kernel writes an error message to dmesg and no packet is received. Must unplug and plug USB again.
Tested with and without a powered USB hub.
i-tec
i-tec USB 2.0 Ethernet Adapter Fast Ethernet (chip ASIX AX88772B)
Works out of the box very stable with ASIX kernel driver on latest Raspbian
3.6.11+ (Nov. 2013), Raspberry Pi model B, 256MB RAM.
Connected through a powered USB hub (may work without it, not tested).
lsusb output: Bus 001 Device 005: ID 0b95:772b ASIX Electronics Corp.
Plugable
Plugable USB2-E100 USB 2.0 10/100 Ethernet adapter
Works out of the box.
(ASIX AX88772 chipset)
Raspberry Pi reboots when you plug it into the USB port,
but after that it works fine.