Open VPN connection
OpenVPN Installation Tutorials
Learn how to setup OpenVPN to connect to Acreto Ecosystem on a wide range of platforms
Learn how to setup OpenVPN to connect to Acreto Ecosystem on a wide range of platforms
In this article, you’ll learn how to set up an OpenVPN client on Gl.iNet and connect it to the Acreto ecosystem.
To connect GL.iNet router with Acreto Ecosystem, you will need:
Existing Acreto Ecosystem, if you don’t have one learn how to create it.
Access to Acreto Wedge.
GL.inet router with OpenVPN client installed.
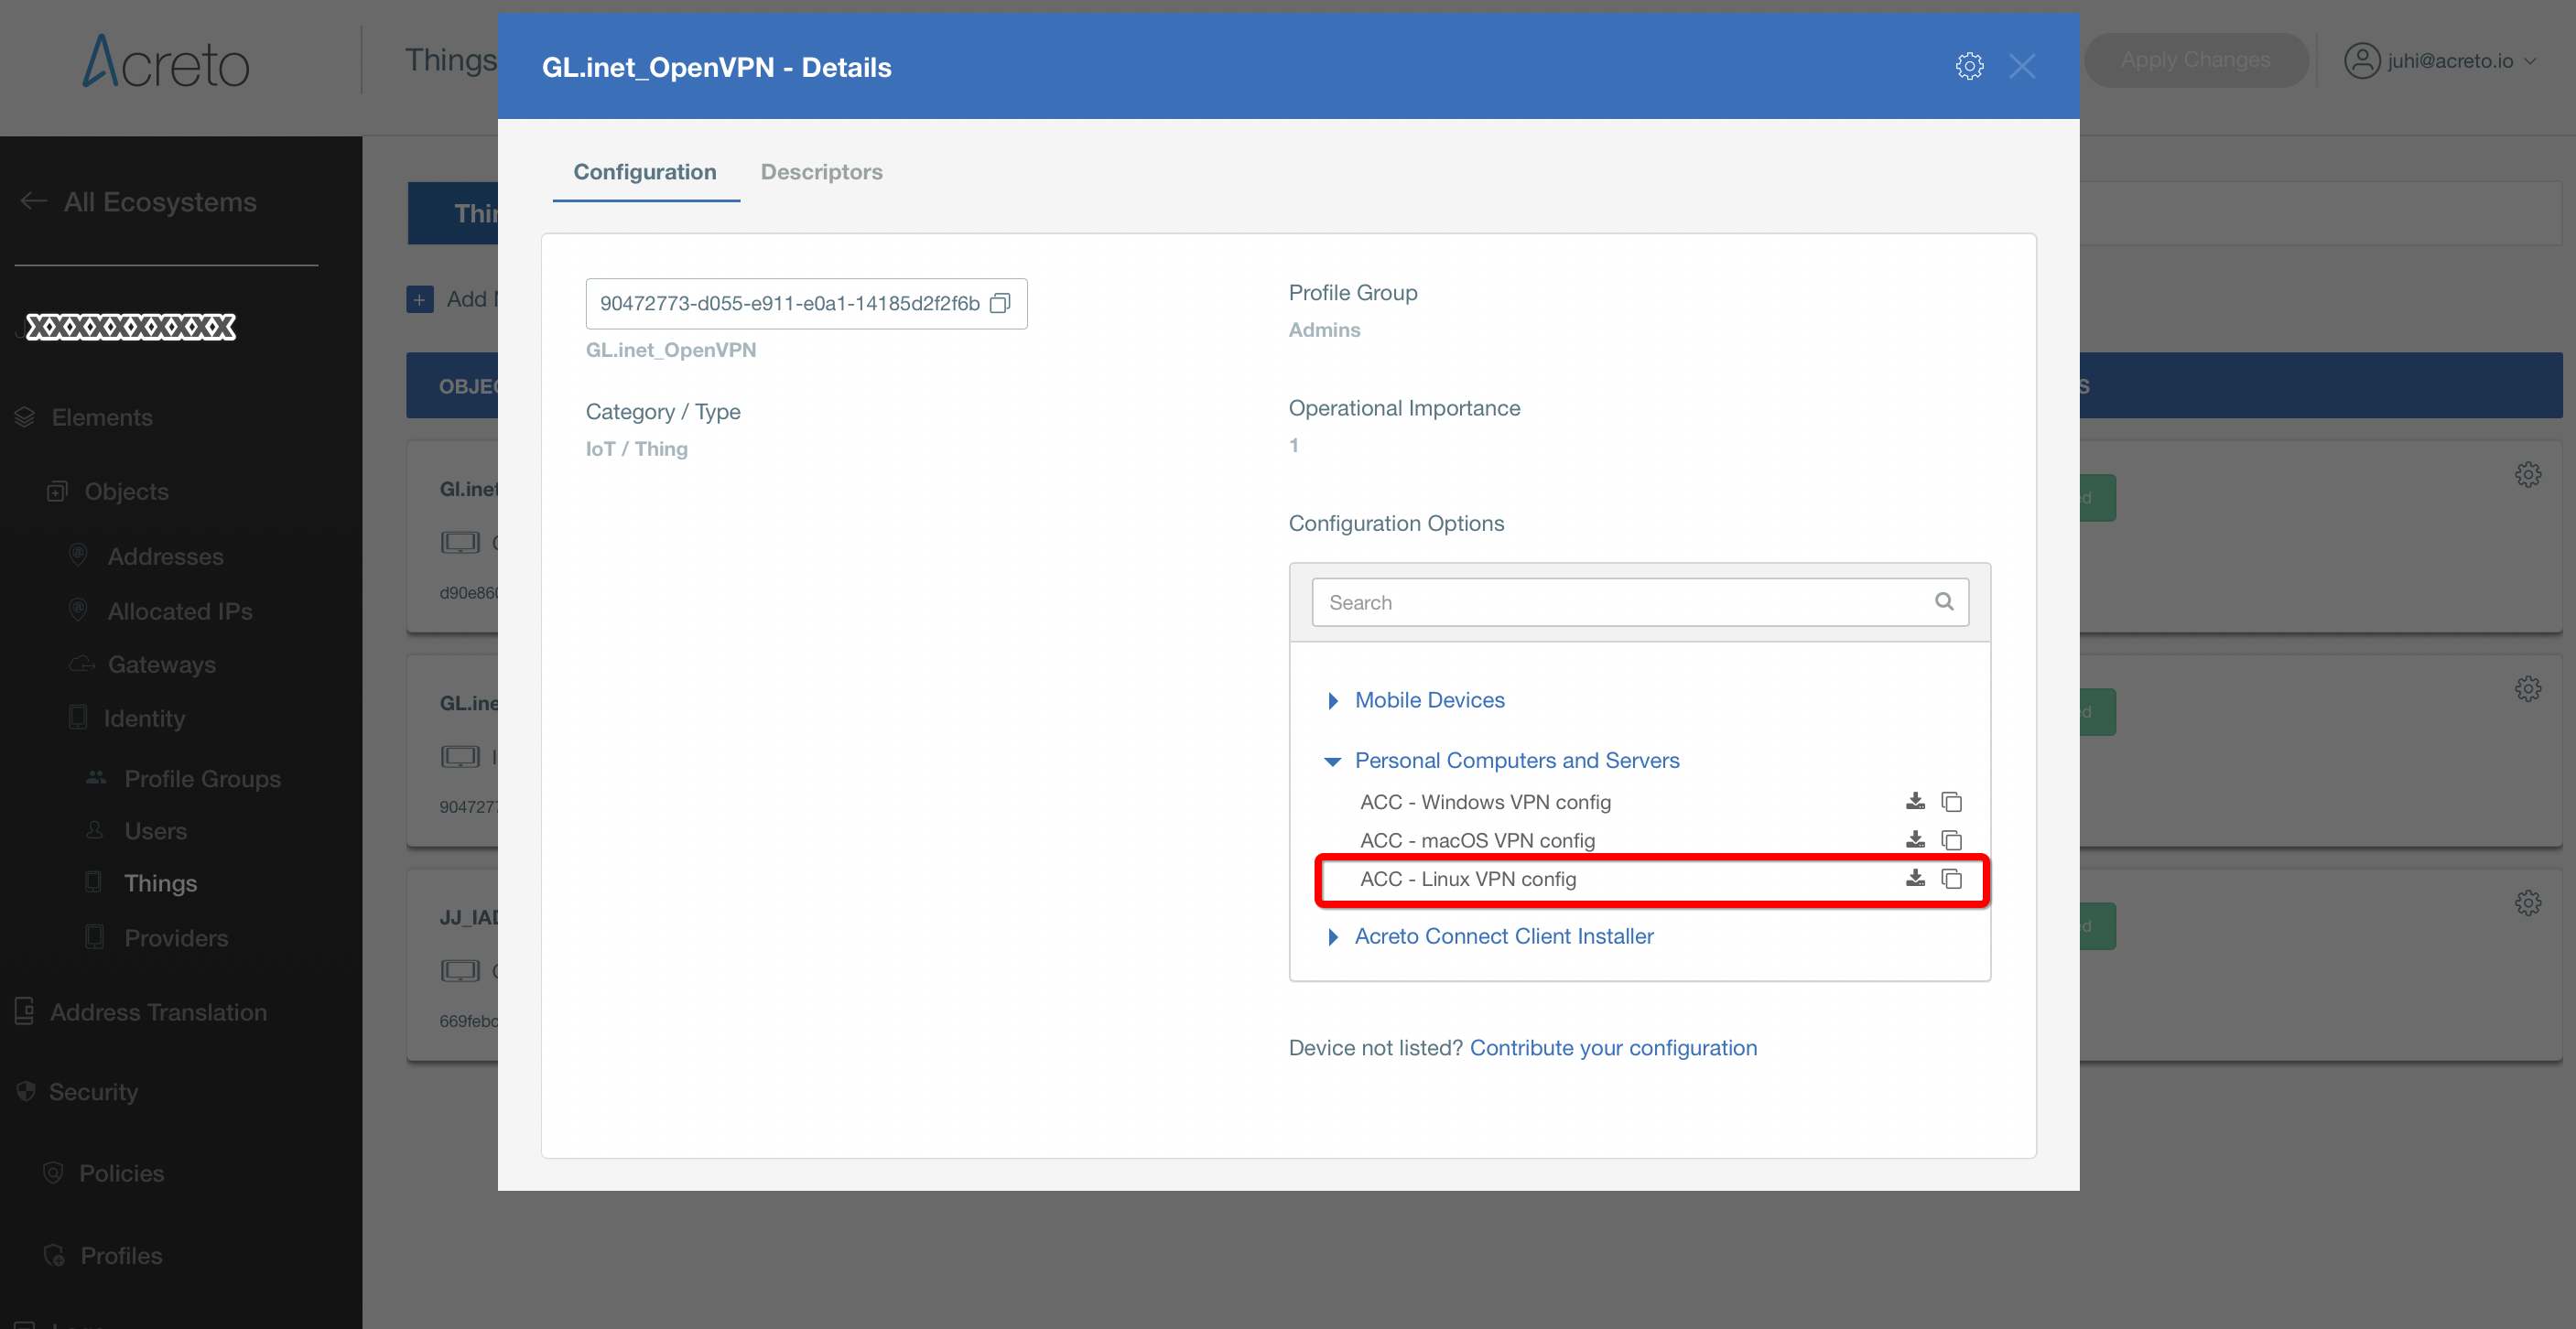
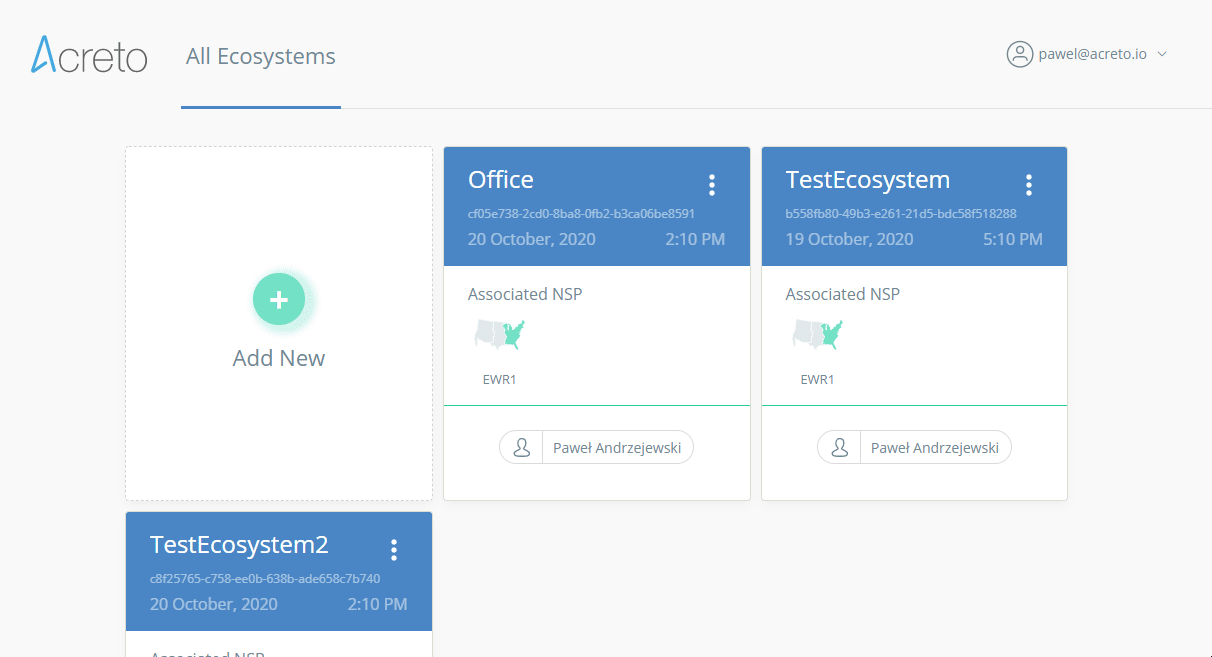
Log in to the Acreto Portal.
Choose your Ecosystem.
Create a new VPN profile using tutorial or use the existing profile.
Download the Acreto VPN profile
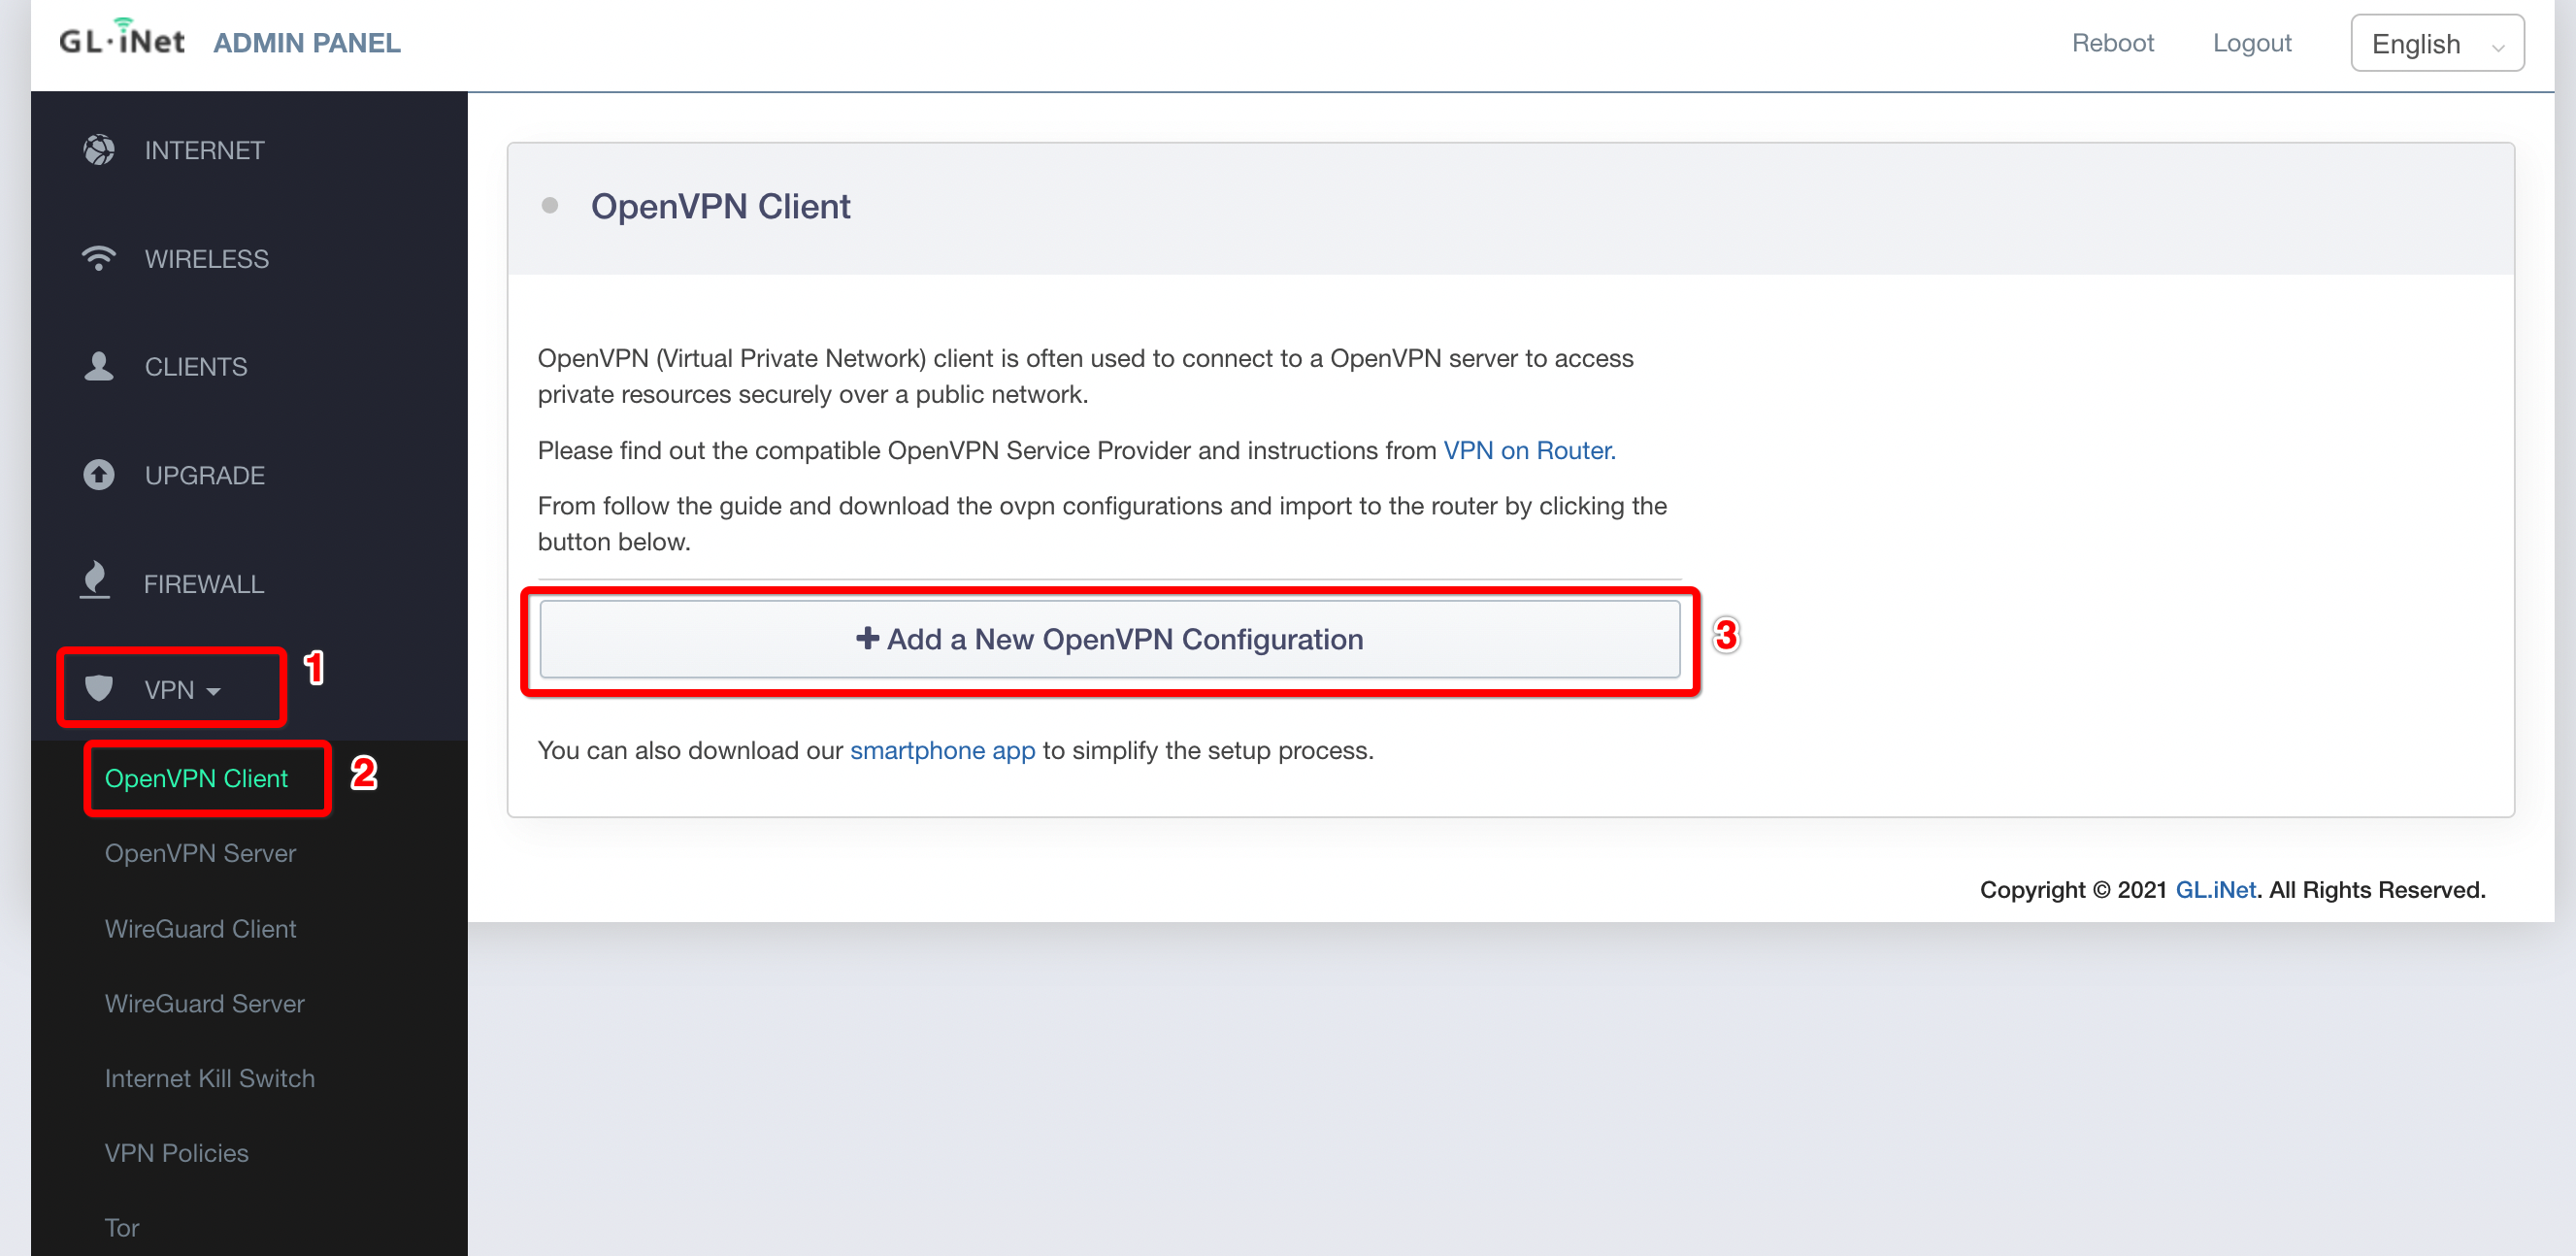
Login to the GL.iNet routers Web Admin Panel.
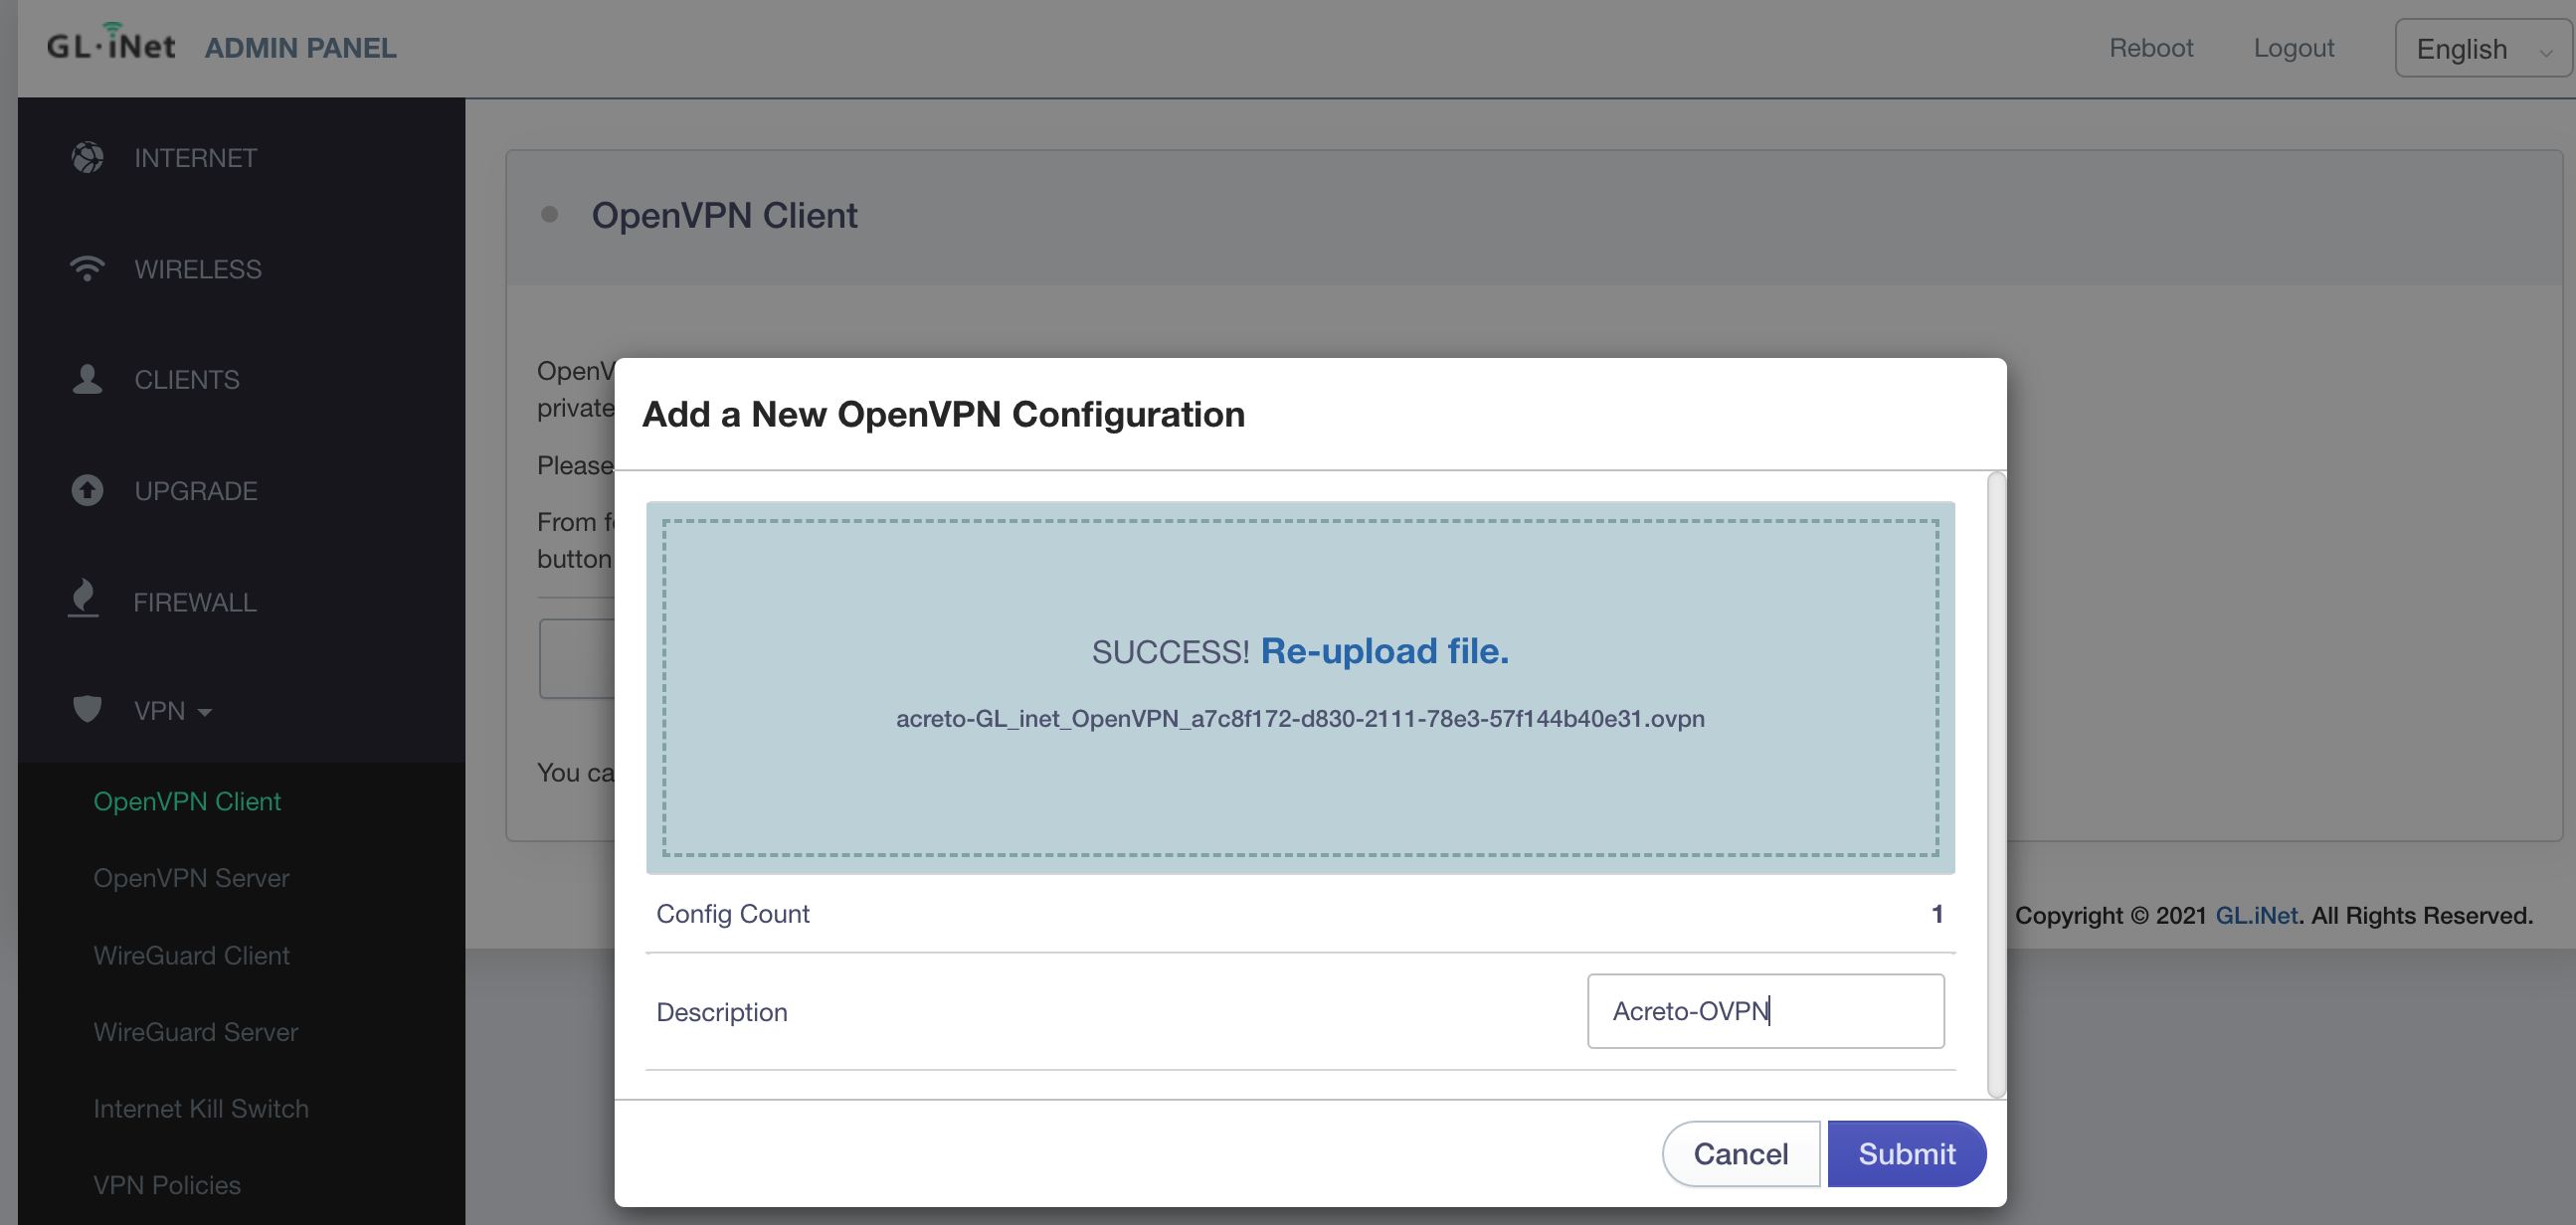
From the left sidebar, goto VPN » OpenVPN Client and click Add a New OpenVPN Configuration.
Add a new OpenVPN configuration.
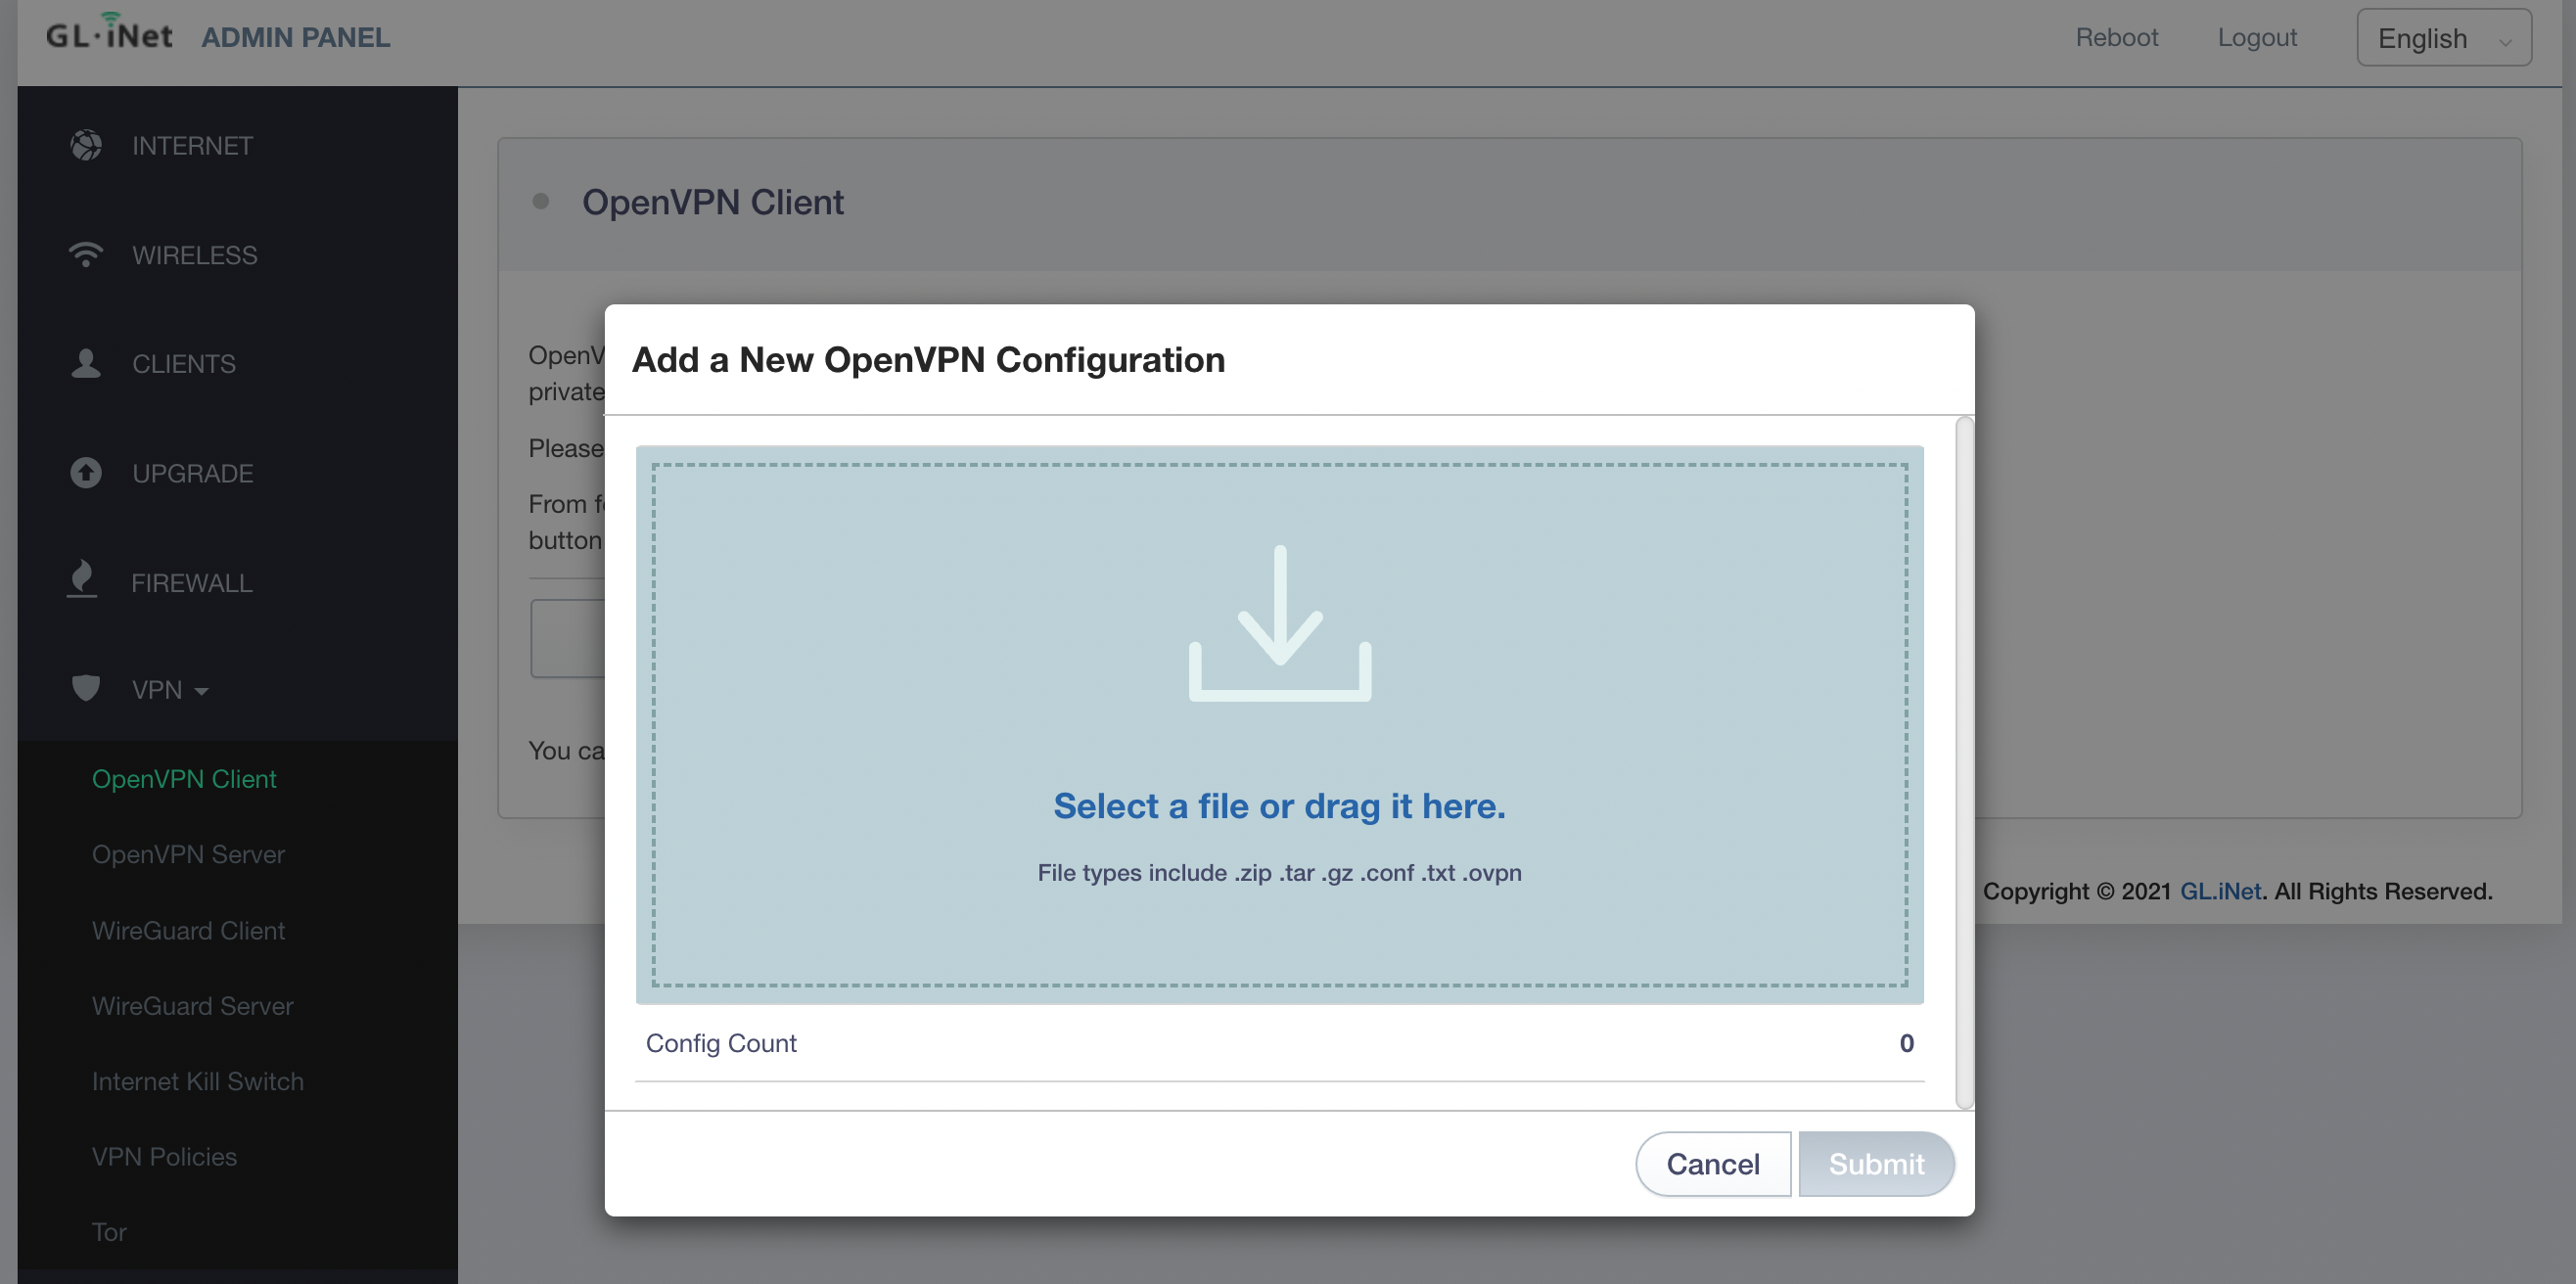
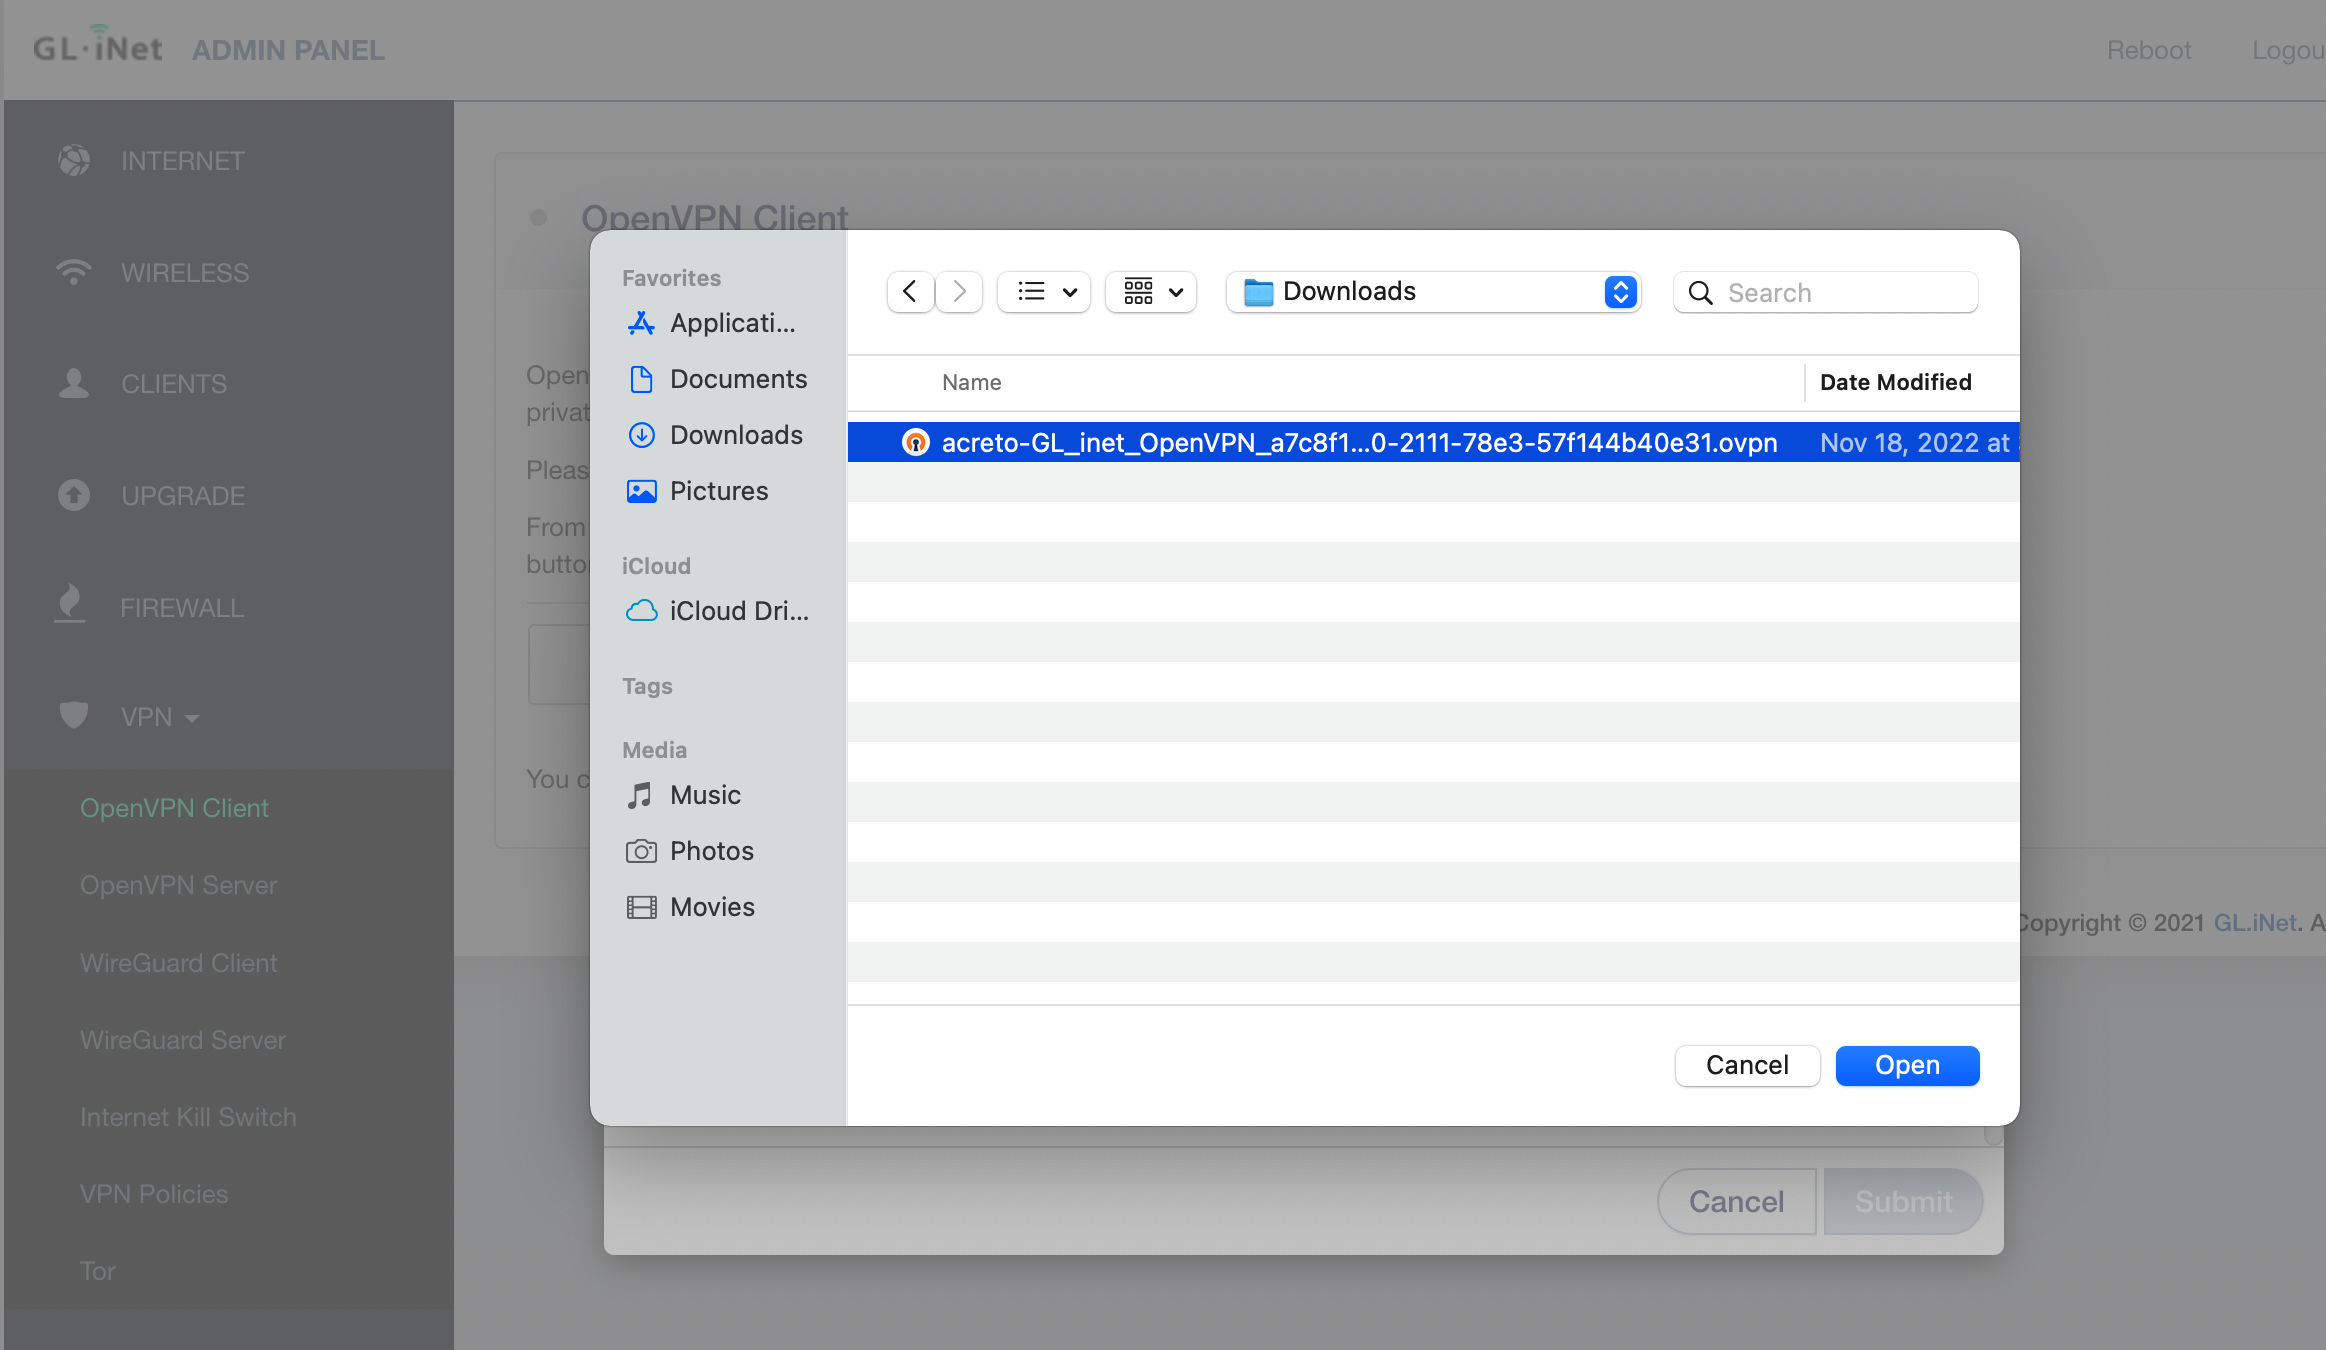
Upload your VPN configuration file from Acreto.
Enter a description for your VPN configuration file and then click Submit to finish the upload process.
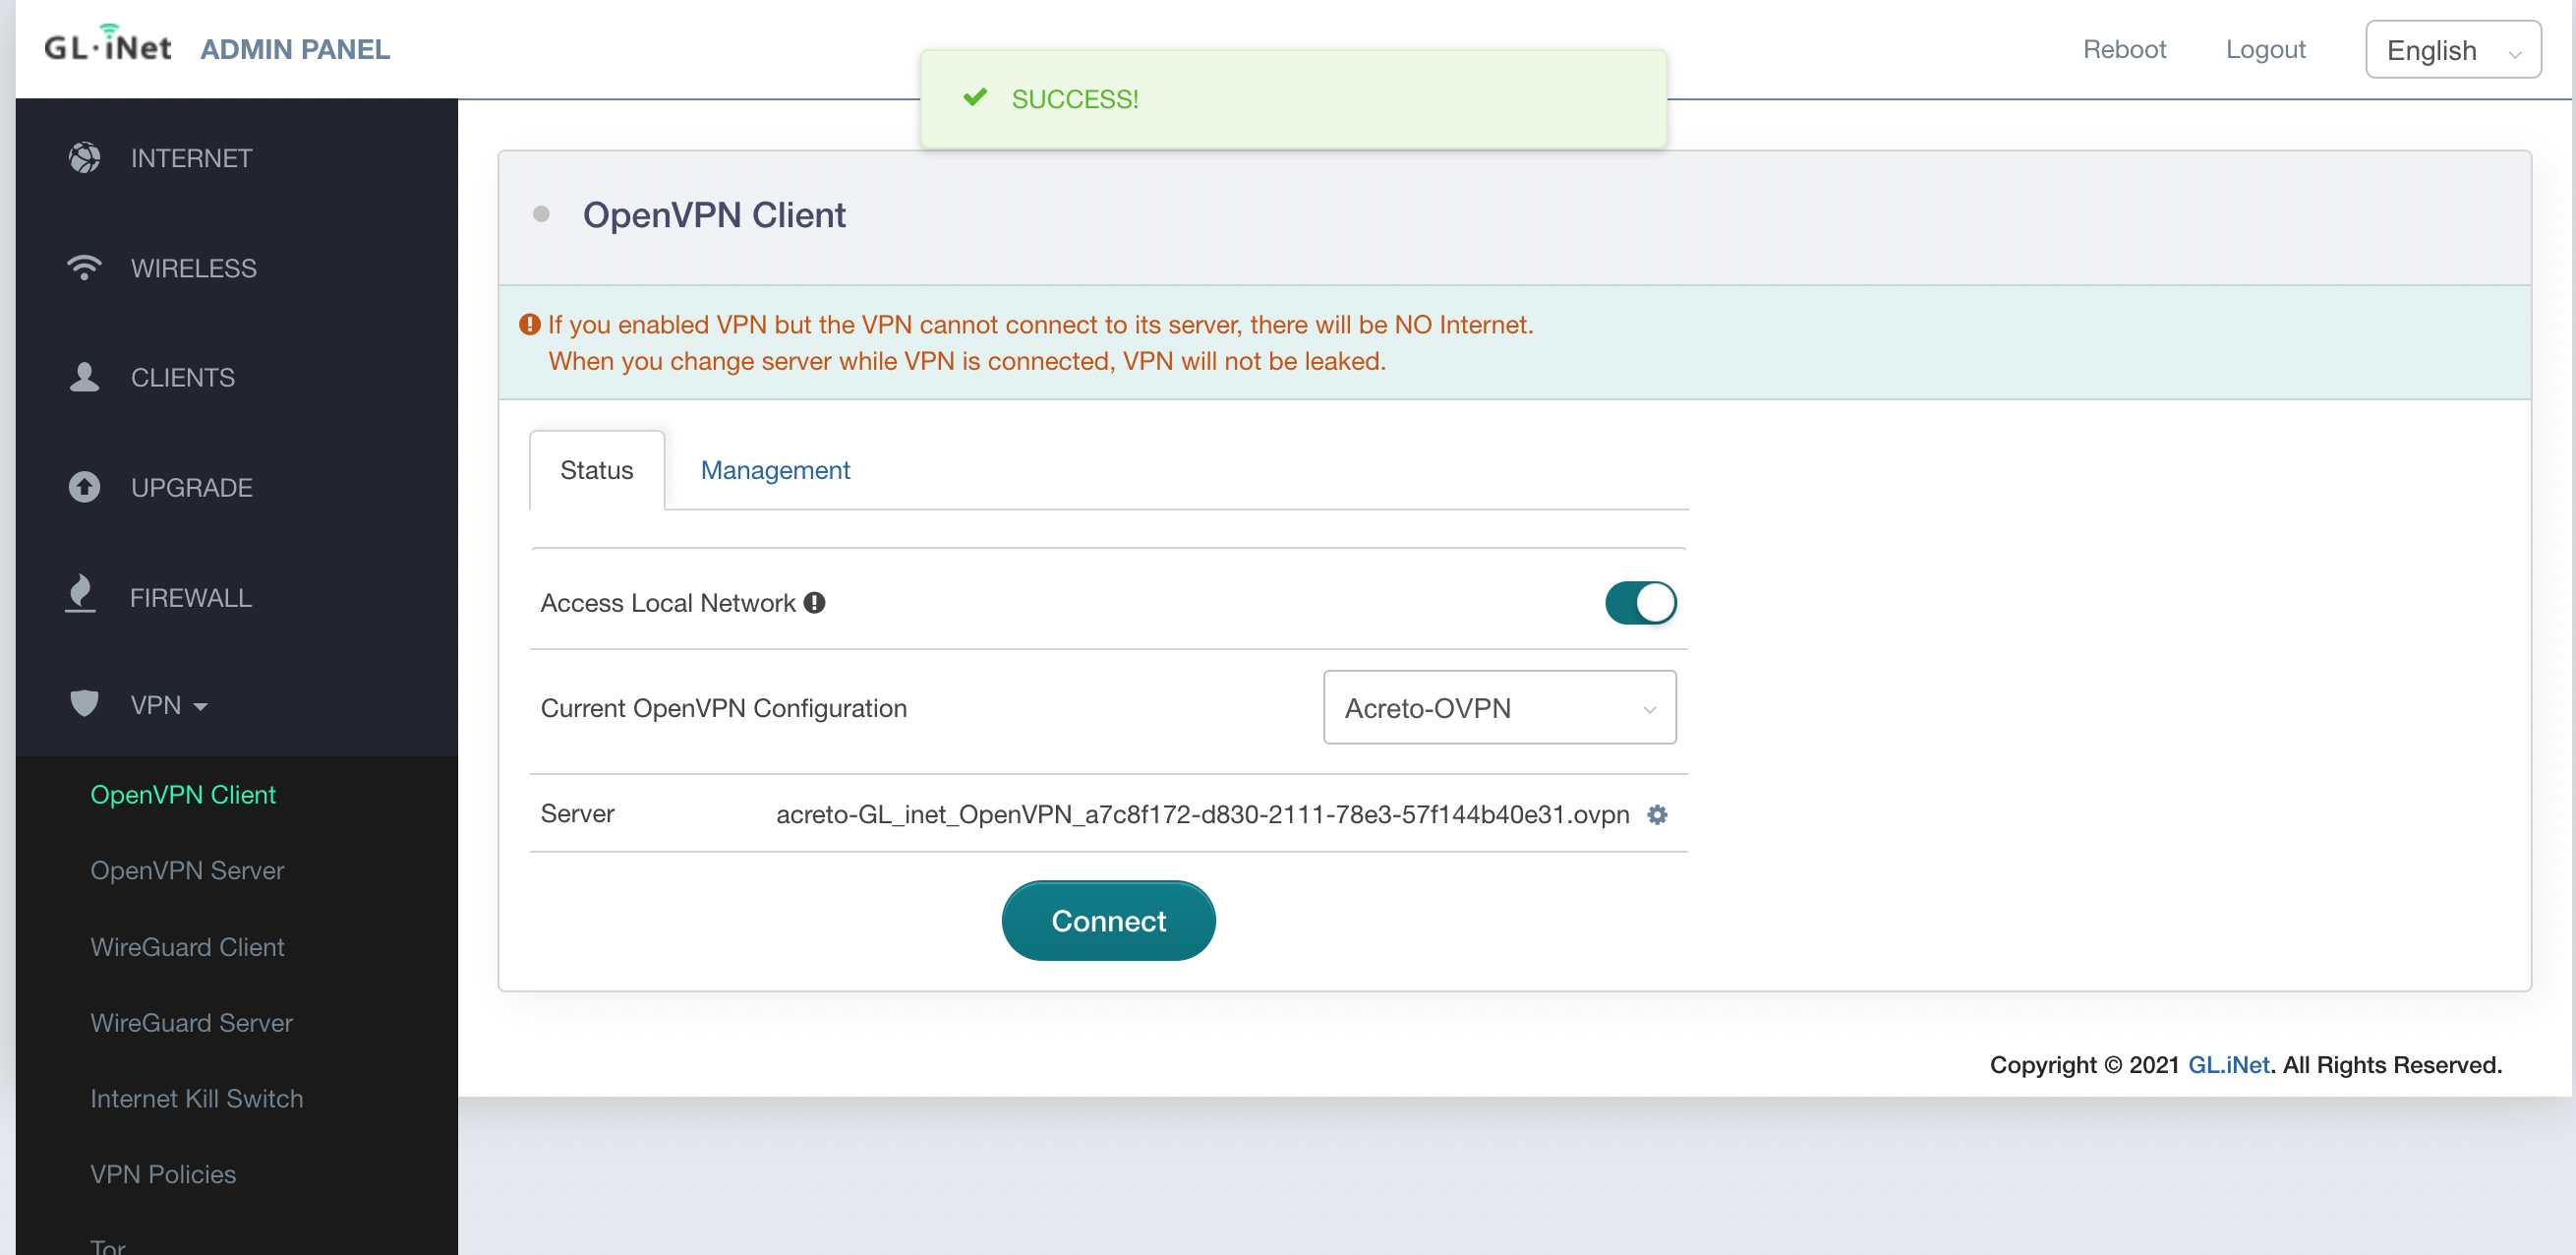
Click Connect to start the VPN connection.
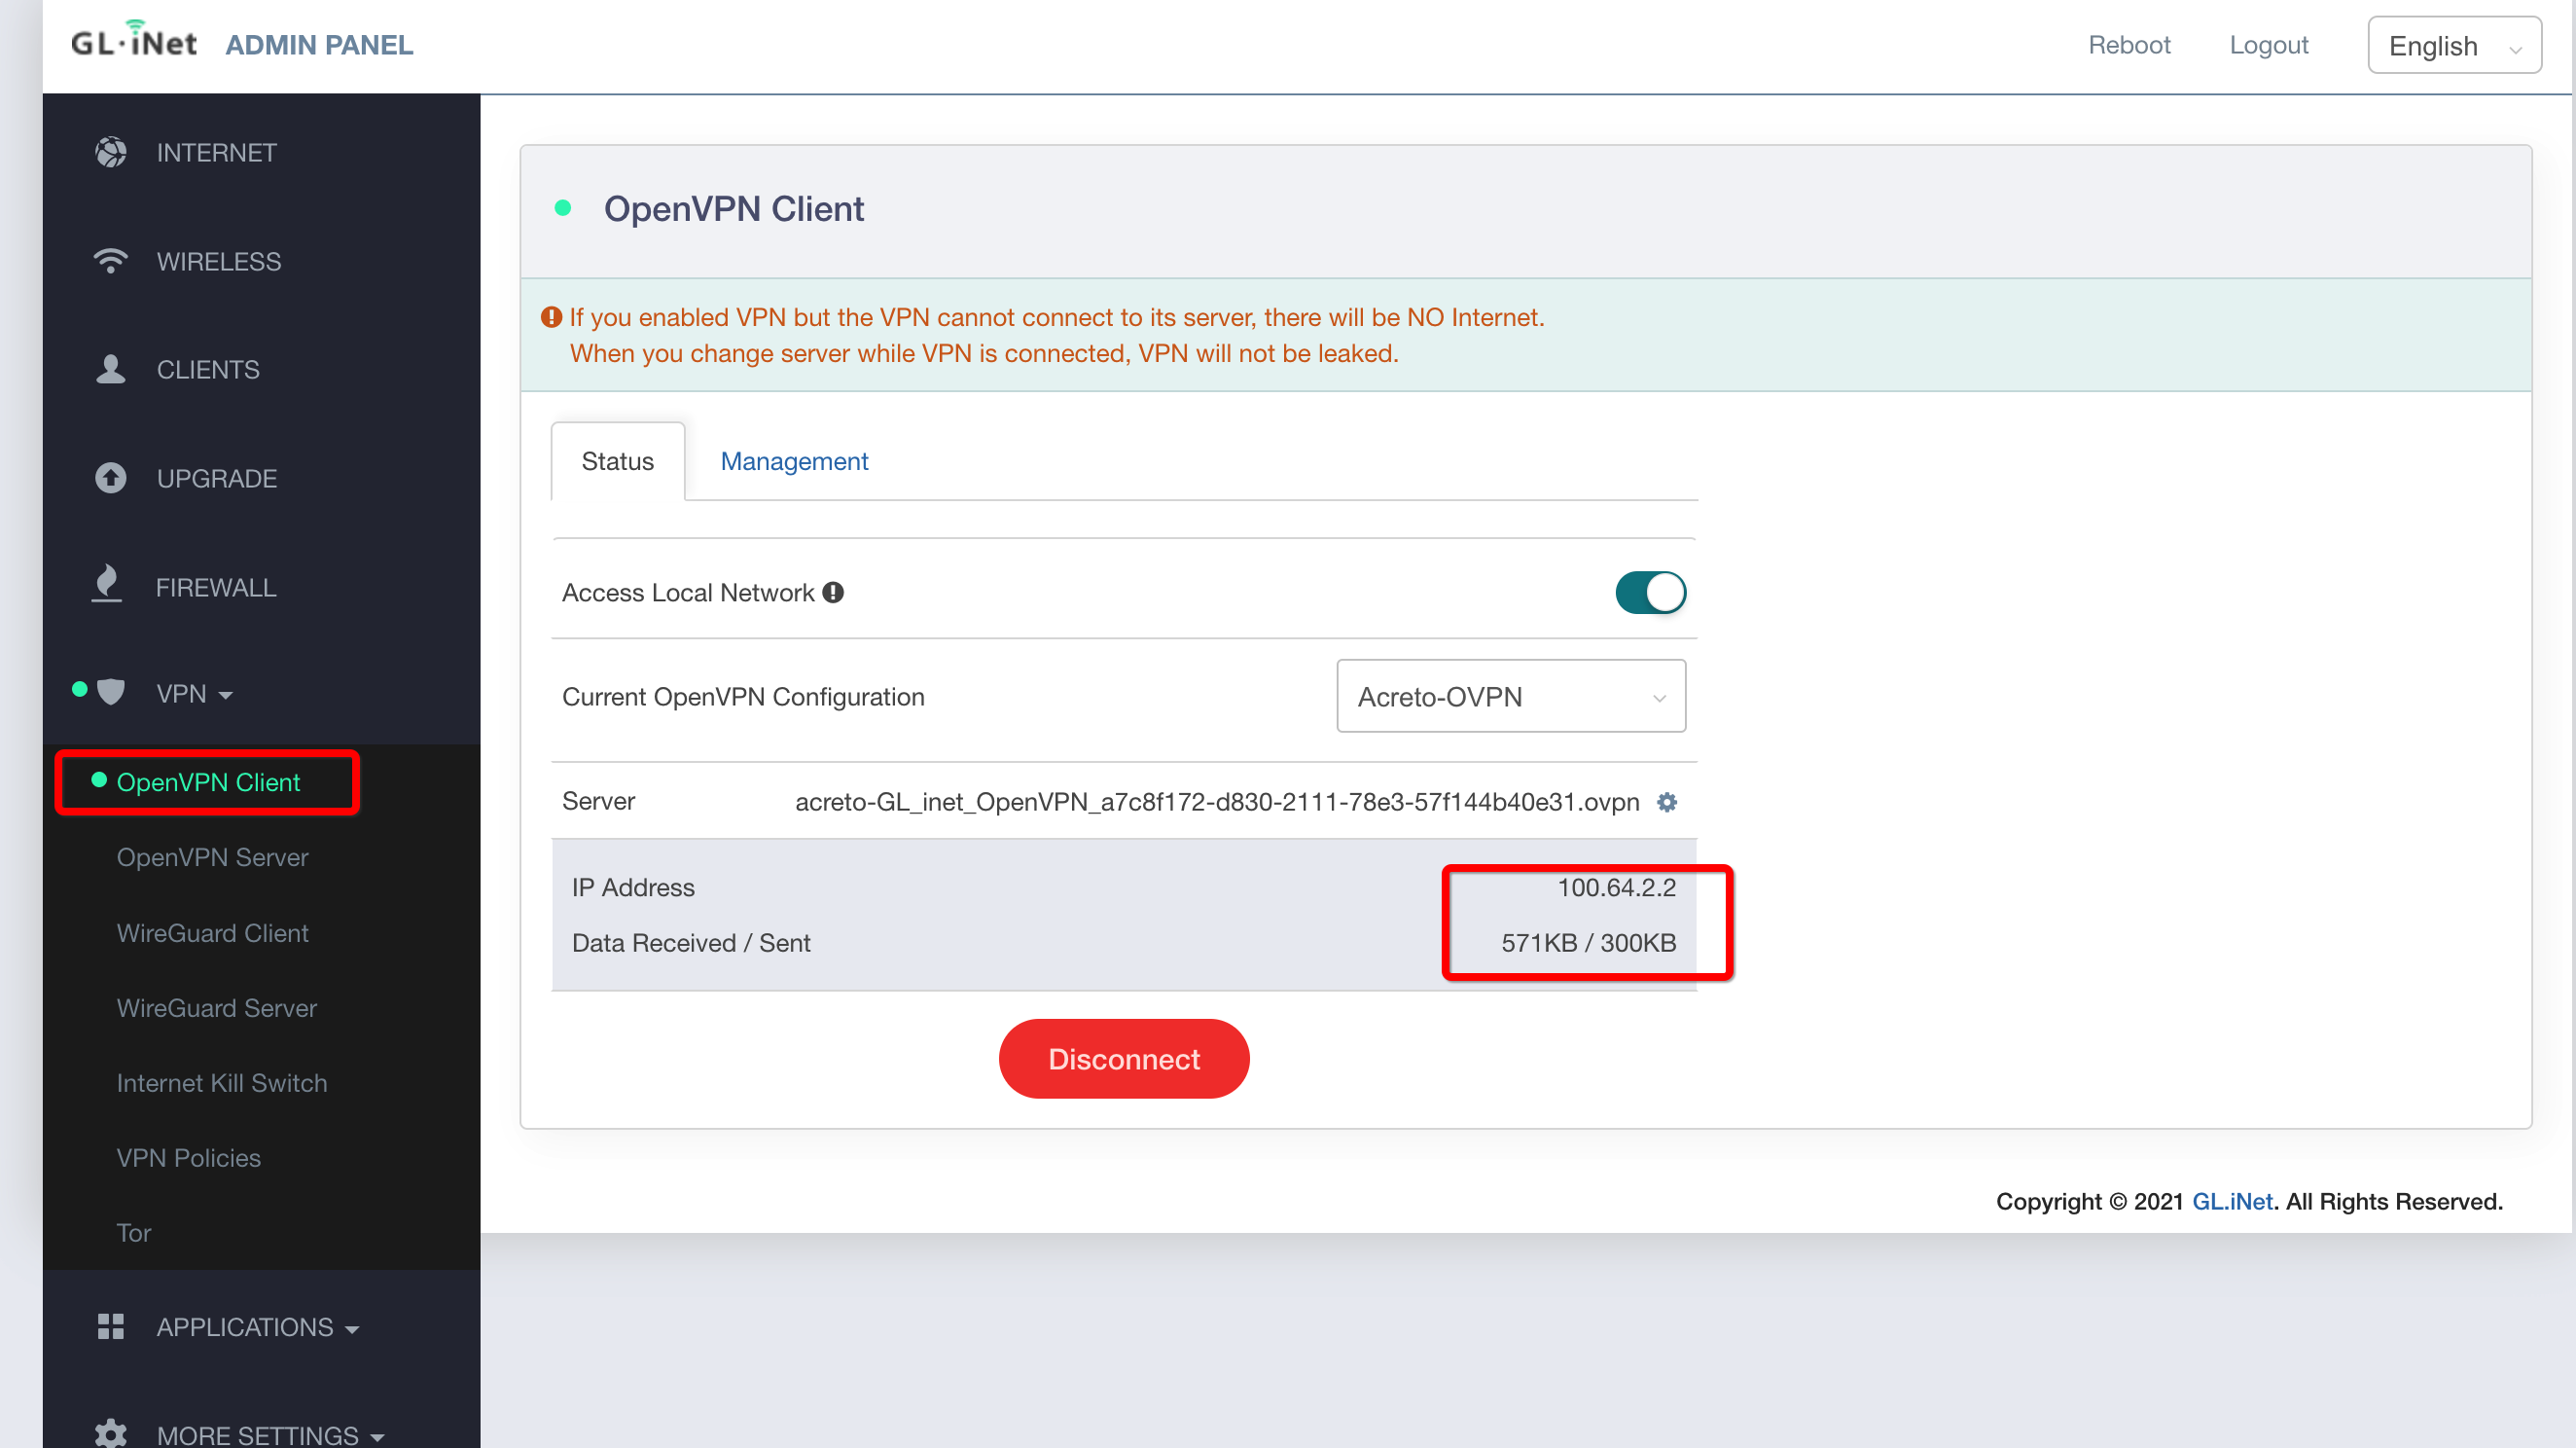
Once connected, the Disconnect button is shown on the screen along with the recieved IP address and Data sent and recieved information.
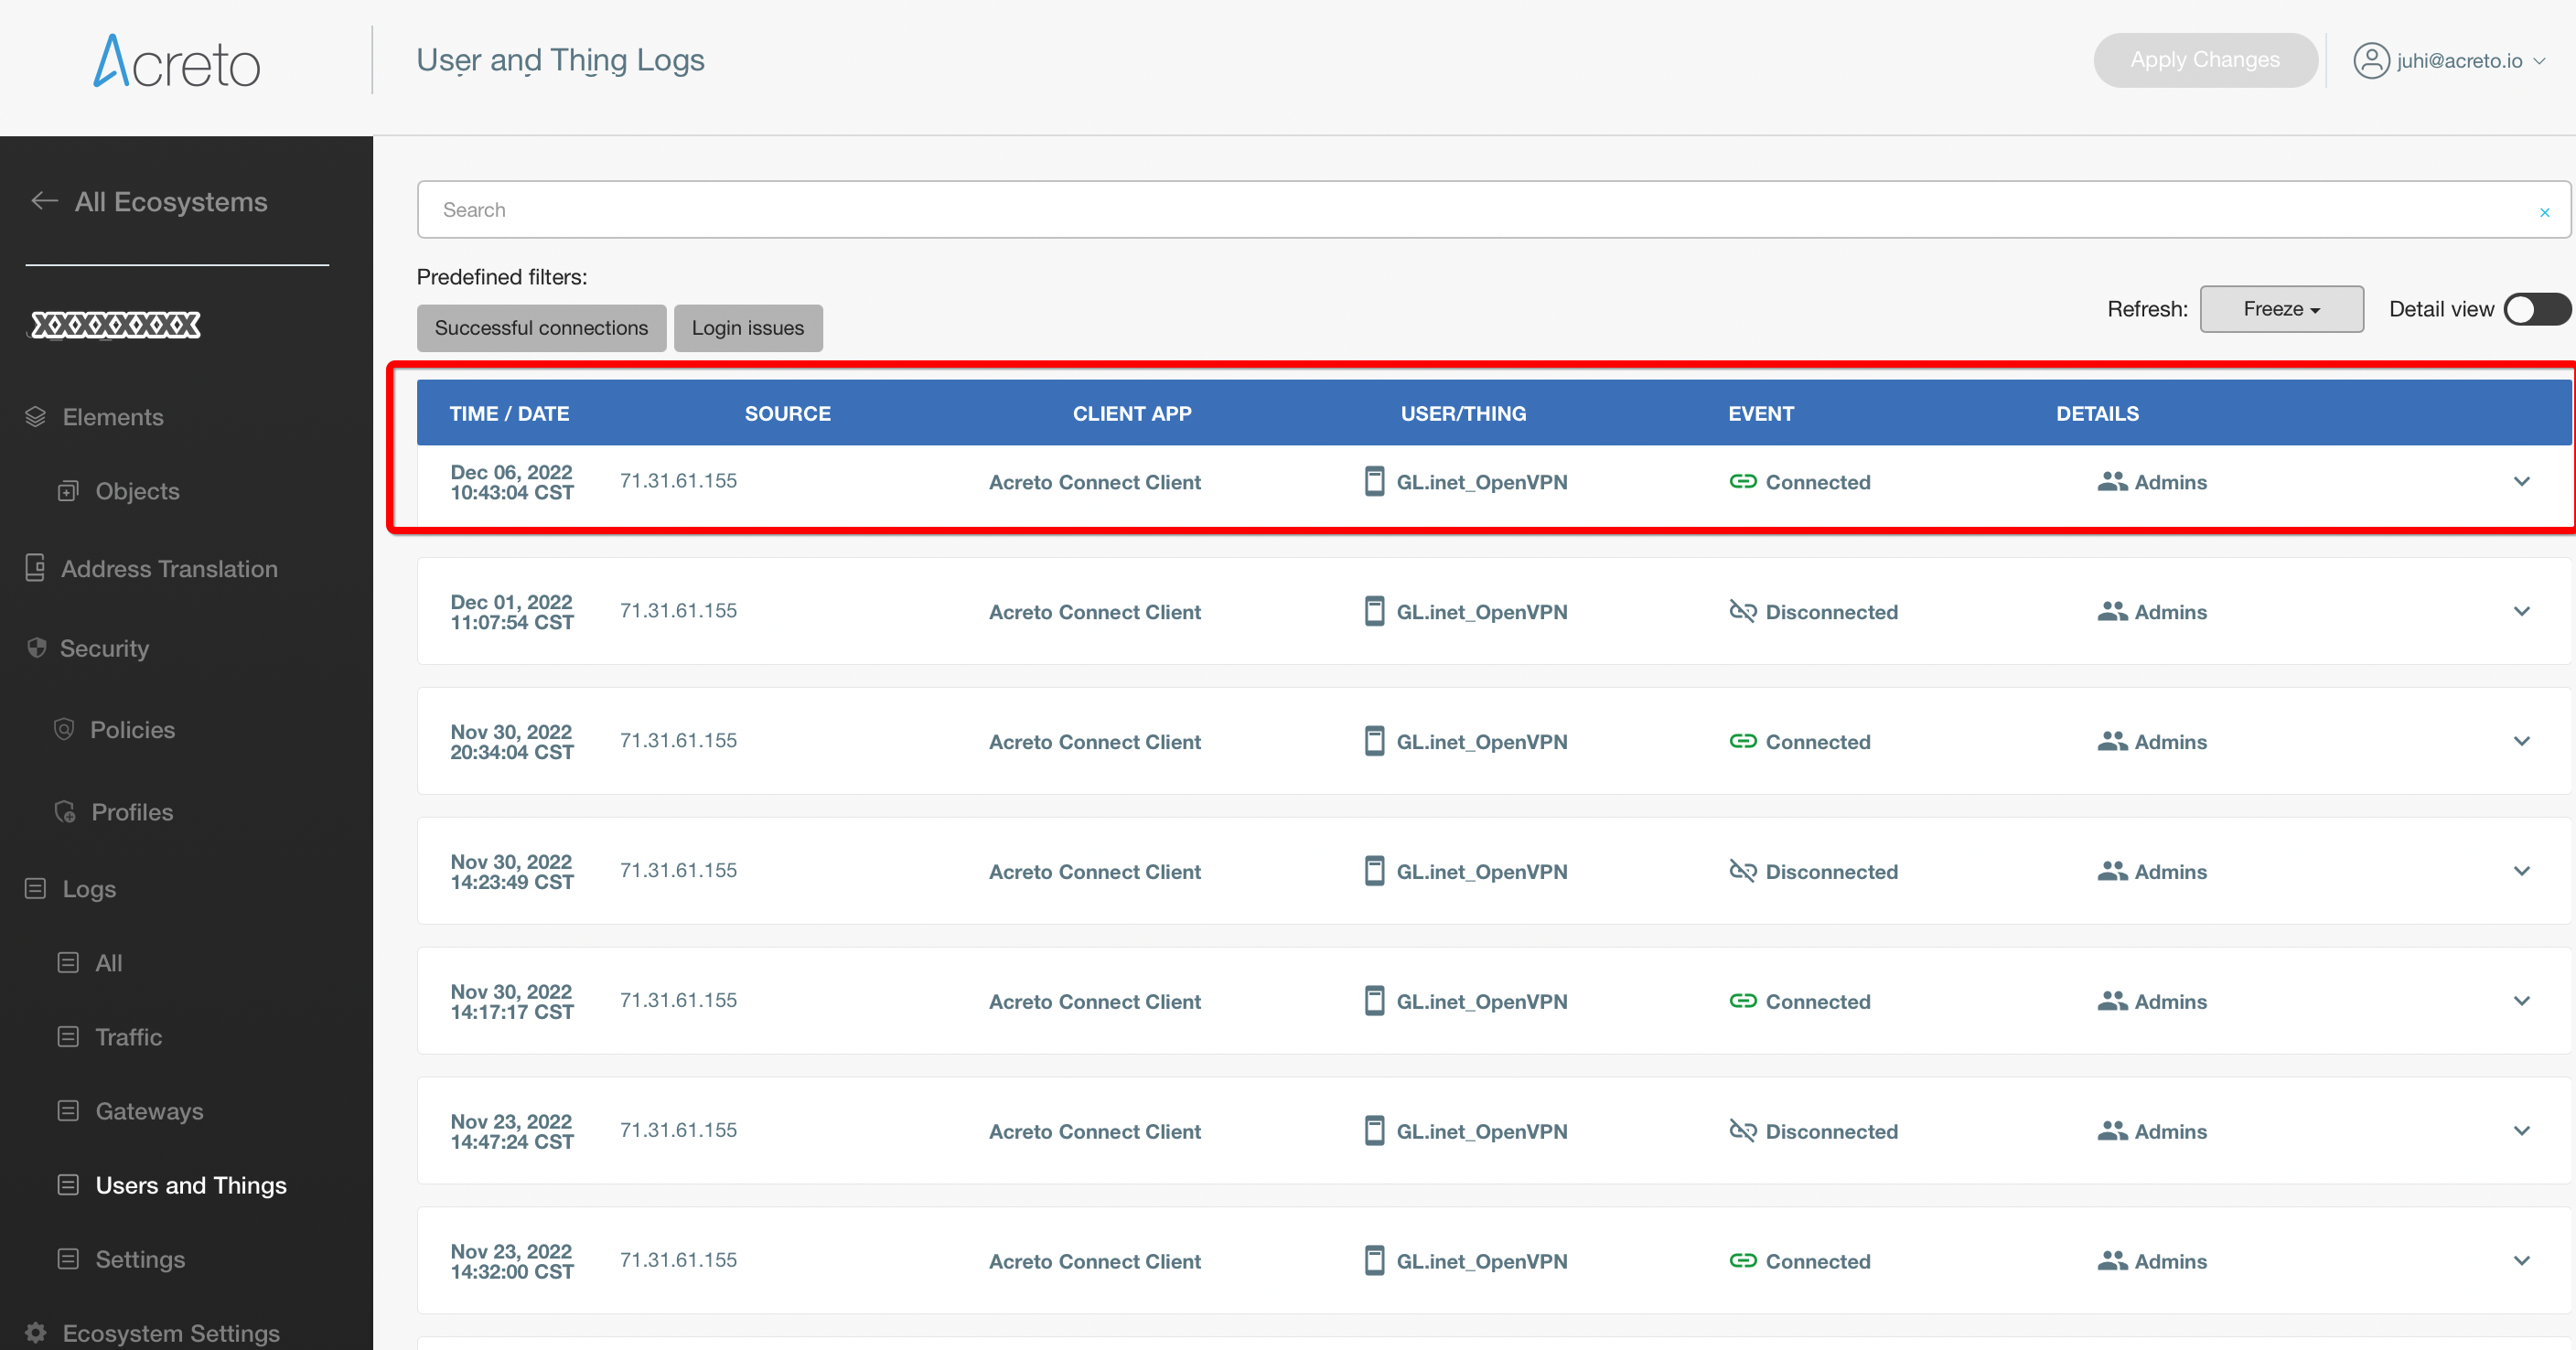
At this point, the machine is connected to Acreto Ecosystem. You may confirm that by checking logs available in Acreto Acreto Portal > Logs > User and Things.
This guide will help you to configure the Acreto Security connection on your Android device with the help of the OpenVPN app.
Android doesn’t have built-in OpenVPN support. It is required to download OpenVPN app from Google Play store.
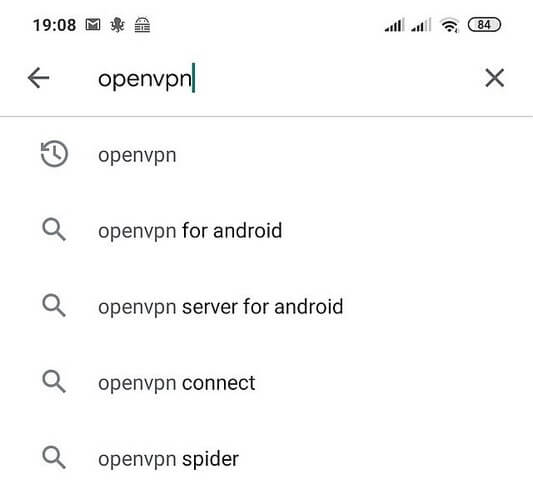
1. Go to the Google Play Store

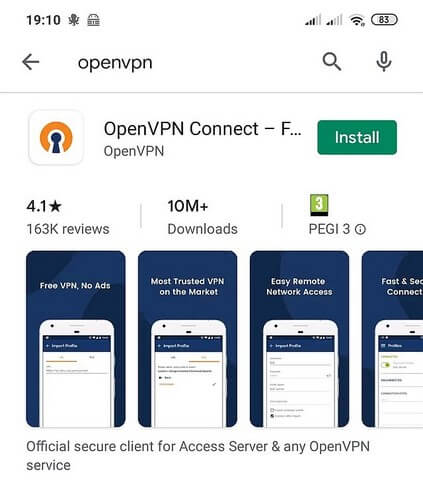
2. Search for the OpenVPN Connect application
3. Install the OpenVPN Connect application
4. Once the application is installed, download the configuration
Open the https://wedge.acreto.net in your favorite browser.
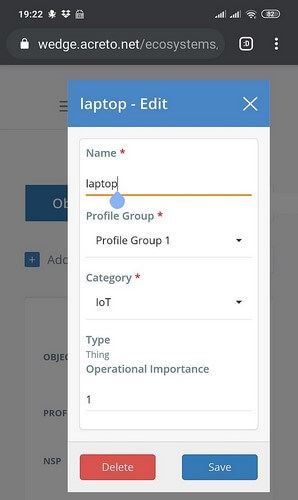
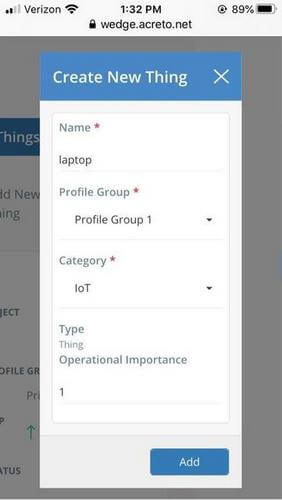
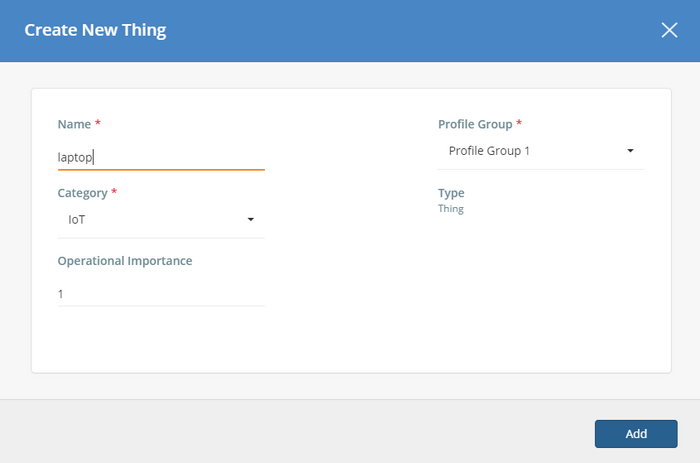
Add a thing named laptop on Acreto Ecosystem - check how to do it
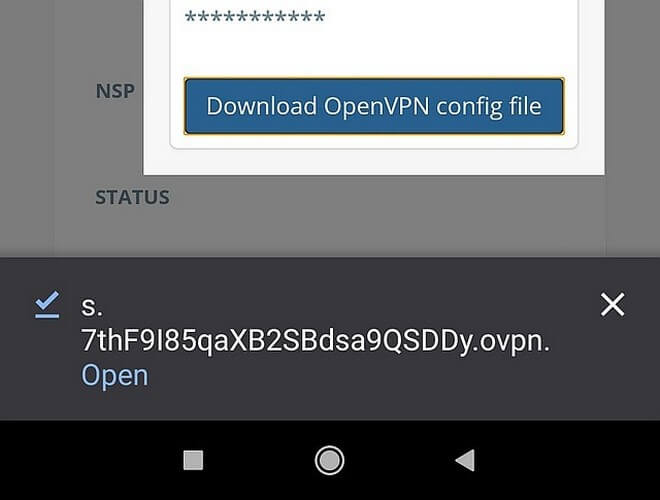
Open the laptop thing details:
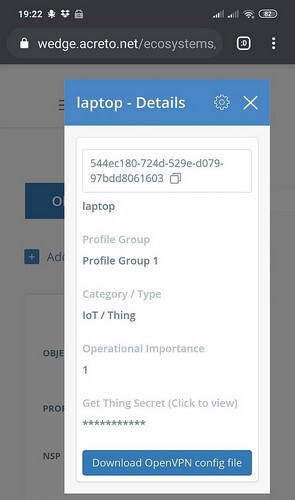
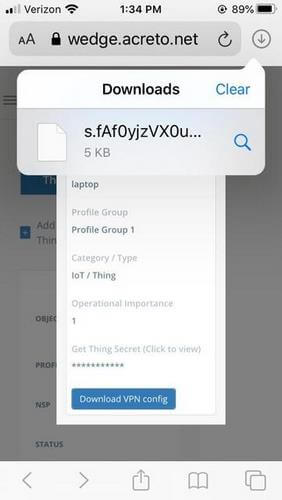
Click on Download OpenVPN config file to save the configuration.
5. Launch the application from your home screen or menu
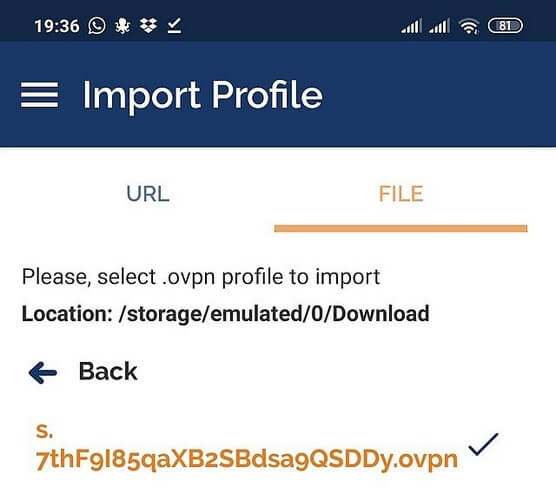
On the following window, select FILE tab.
6. A similar permissions prompt window should be received
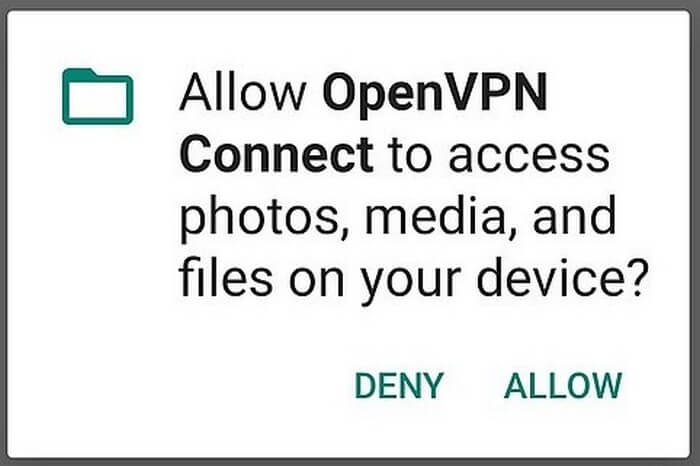
7. Click Allow and navigate to the folder with OpenVPN config file
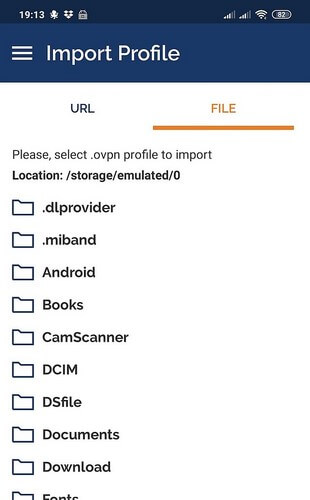
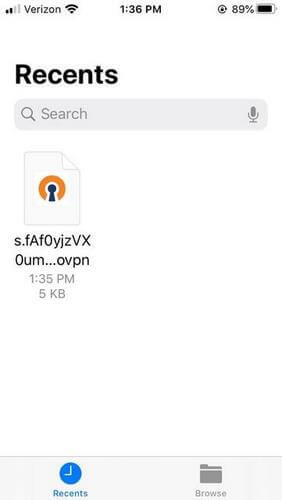
By default, it should be in the downloads folder.
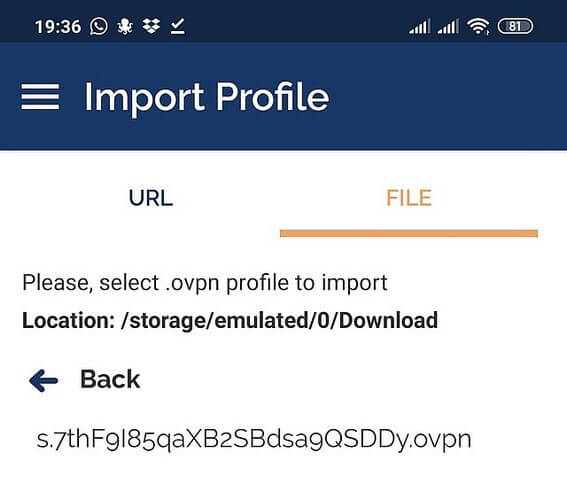
Make sure that OVPN is selected (see image below), then select the files you want to import and press IMPORT button on the upper-right corner.
8. Enter any title for the connection
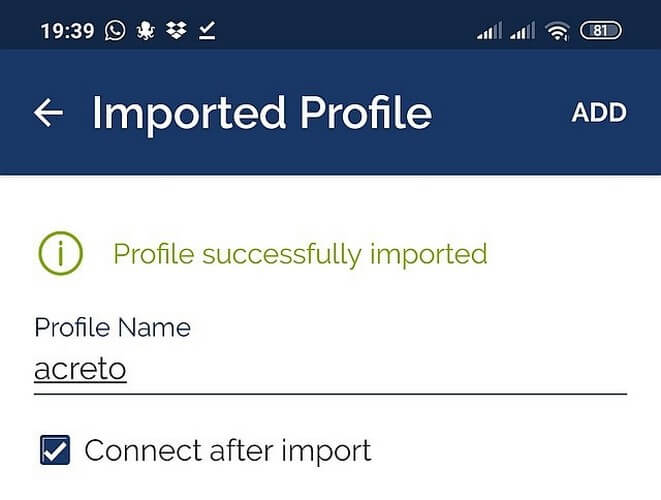
Select Connect after import
Then press the Add button.
9. When asked for permissions
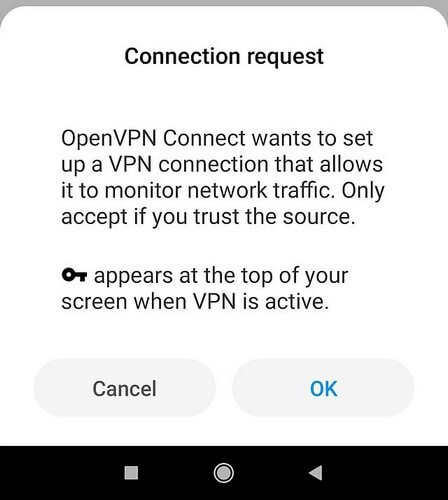
Click the OK button.
10. When prompt for a certificate
Click on Continue button.
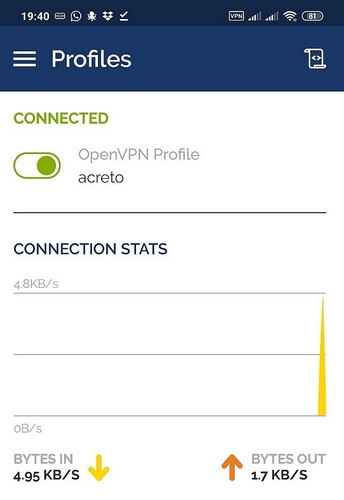
11. The connection is successful
The connection stats window should be visible.
There you can see extensive information about your connection, such as current data throughput or duration.
12. To disconnect
Simply press the switch button next to the OpenVPN profile name and toggle it off.
This guide will help you to configure the Acreto Security connection on your Apple mobile device with the help of the OpenVPN app.
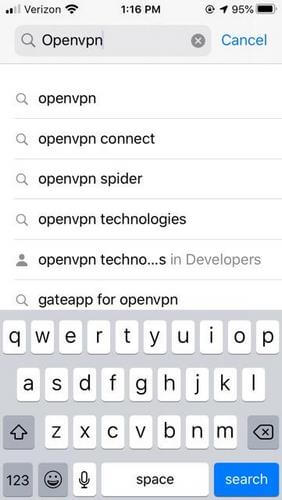
1. Go to the App Store on your iPad/iPhone
2. Enter OpenVPN connect in the search bar
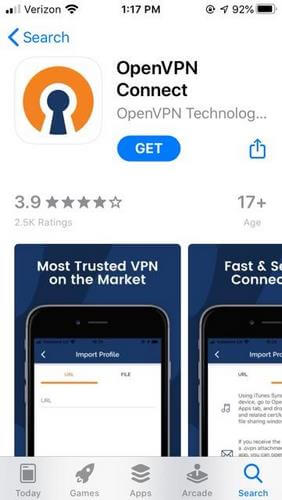
3. Tap on the GET button
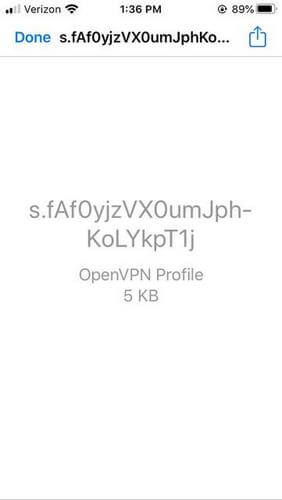
4. Once the application is installed, download the configuration
Open the https://wedge.acreto.net in your favorite browser.
Add a thing named laptop on Acreto Ecosystem - check how to do it
Open the laptop thing details:
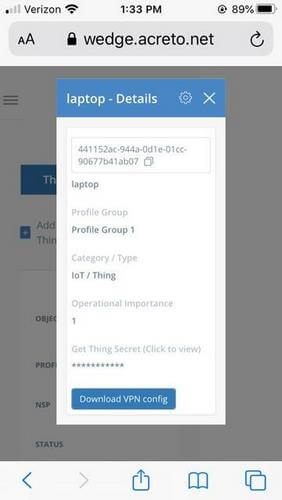
Click on Download OpenVPN config file to save the configuration.
5. Launch the application from your home screen or menu
Select whether you wish to enable push notifications.

Accept the OpenVPN Policy Agreement
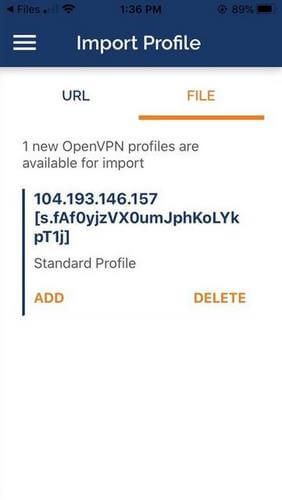
6. Go to home screen and open Files
7. Navigate to the folder with OpenVPN config file
Select the Share button in the upper right-hand corner.
Press Copy to OpenVPN

8. Add the VPN profile
Ensure the OpenVPN profile selected is correct, then press ADD.
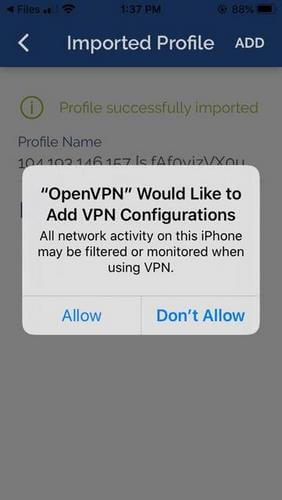
9. Name the connection
Feel free to specify the profile name, by changing the field

Be sure to check the box Connect after import

10. When asked for permissions
Click Allow to allow OpenVPN to add VPN connections.
Click Yes to allow OpenVPN to enable the VPN connection.
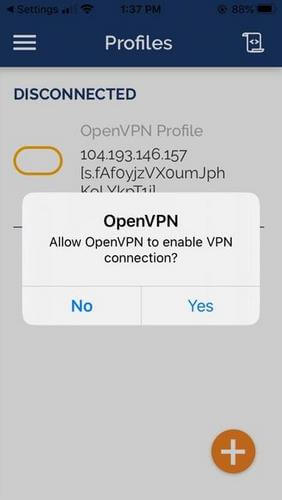
If all went well, you should see the following

11. To disconnect
Tap on the same button you used to connect.
This article will demonstrate how to secure your Ubuntu system with an Acreto Secured Connection. To create an additional layer of security, we’ll use the OpenVPN application.
Before proceeding to the installation, make sure that you’ve added at least one Thing to your Ecosystem - if not, check how to do it.
Acreto Wedge offers a ready-to-use script that will install and configure the Acreto client on your Ubuntu system:
sudo ./acreto-connect.shOnce the script finishes downloading your device should be connected to Acreto.
Don’t want to manage the VPN setup automatically?
How to connect to OpenVPN manually using the terminal:
ctrl + alt + t).sudo apt-get install openvpncd /etc/openvpncurl -k --silent --request POST -H 'Accept: text/plain' \
https://api-is-rock-solid.acreto.net/v2/tlsvpn/config?_token=SECRETsudo apt-get install ca-certificatessudo openvpn [file name]sudo openvpn acreto.ovpnctrl + c.This article will show you how to secure your MacOS device with Acreto Secured Connection. To create an additional layer of security we will use the Tunnelblick app.
The Tunnelblick application is a recommended option for connecting to ACRETO servers on your Mac.
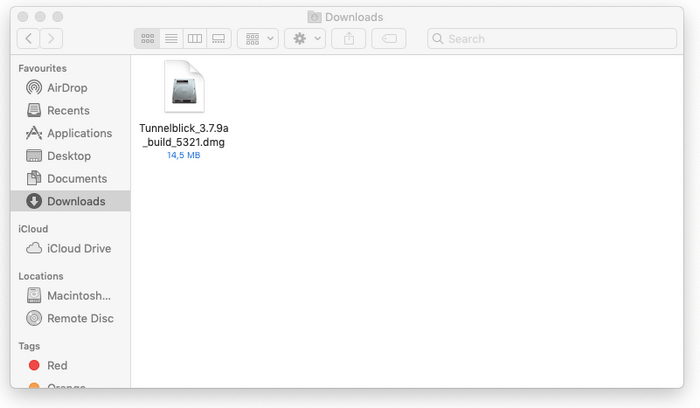
1. Download the Tunnelblick
Tunnelblick provides free, user-friendly control of OpenVPN client connections for macOS.
2. Download the OpenVPN configuration
Add a thing named laptop on Acreto Ecosystem - check how to do it
Open the laptop thing details:
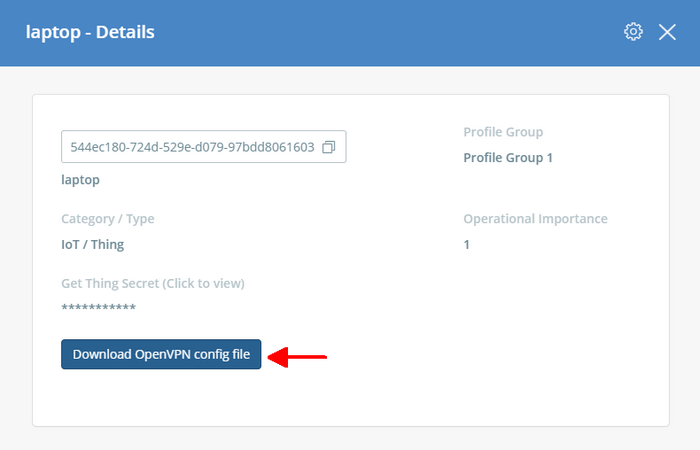
Save the file as-is, or change the name to acreto-thing.ovpn
3. To begin the installation of OpenVPN for macOS
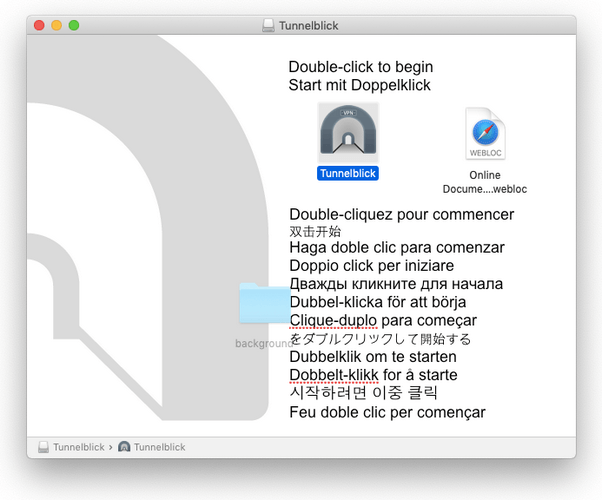
Navigate to your Downloads folder and double-click the Tunnelblick image (DMg) file you just downloaded
4. Double-click on the Tunnelblick icon in the Tunnelblick disk image Finder window
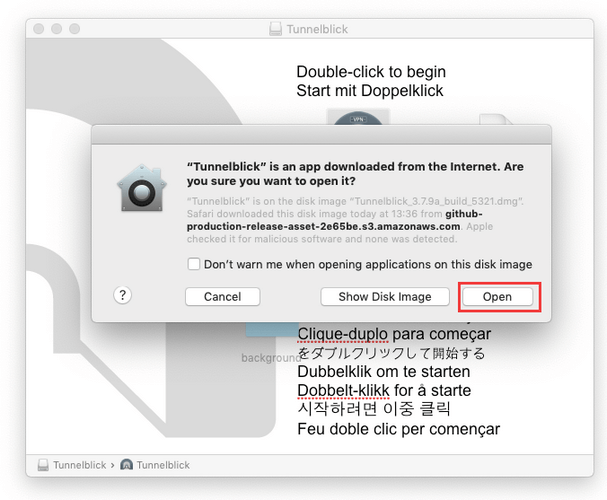
5. A dialog box will appear
Tunnelblick is an app downloaded from the Internet. Are you sure you want to open it?
Click Open
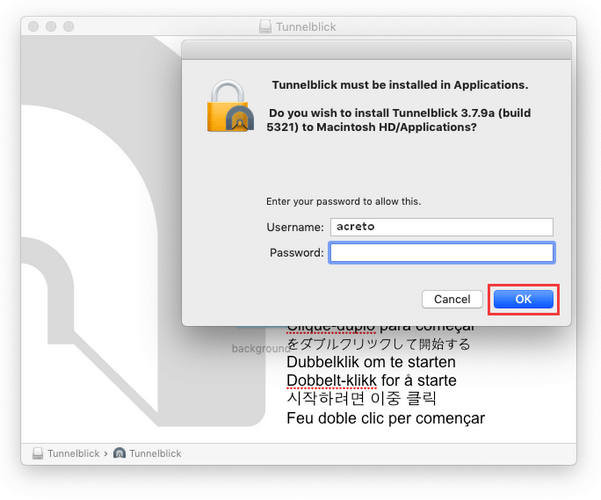
6. The installer will ask for your password. Enter it and click OK:
7. After the installation completes, you will see a pop-up notification:
Installation succeeded. Tunnelblick was successfully installed. Do you wish to launch Tunnelblick now? (An administrator username and password will be required so Tunnelblick can be secured.).
Click Launch
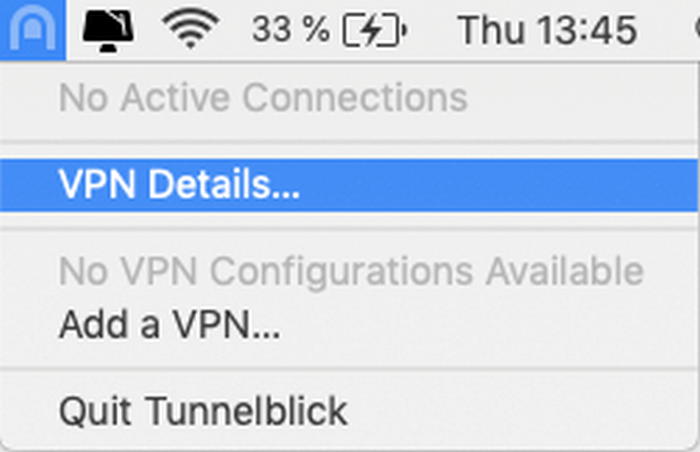
8. Alternatively, you can click on the Tunnelblick icon on the status bar
and click VPN details:
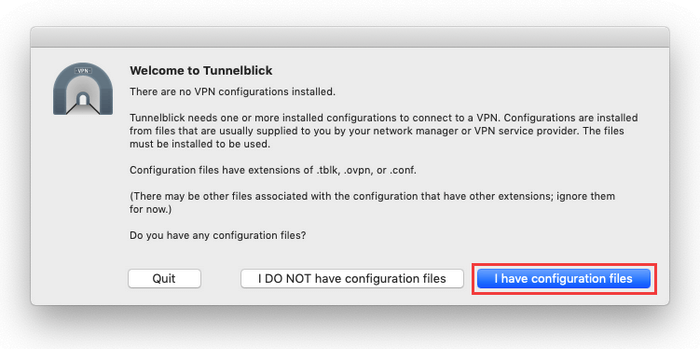
9. A dialog box will appear:
There are no configurations installed.
Click I have configuration files
10. A pop-up will appear with instructions on how to import configuration files:
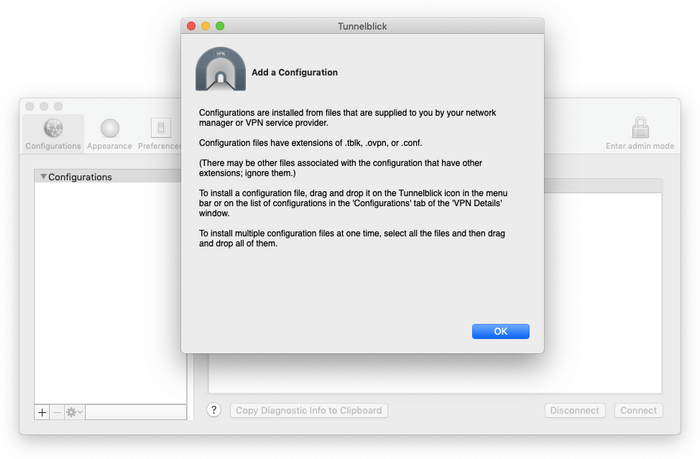
Click OK
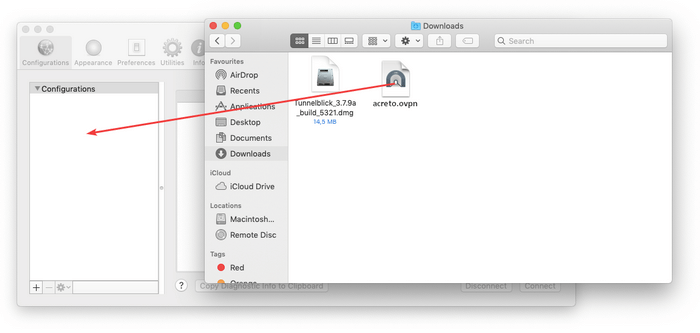
11. Drag and drop the previously downloaded .ovpn file
From your Downloads folder, copy->paste or drag and drop to the Configurations tab on the Tunnelblick.
12. A new pop-up will appear
The Installer will ask if you want to install the configuration profile for your current user only, or for all users on your Mac.
Select your preferred option: [All Users] / [Cancel] / [Only Me]
13. You will be asked to enter your password again.
14. A new pop-up warning will appear about comp-lzo deprecation.
You can safely check the Do not warn about this again and click OK.
15. Select the server and click Connect.
16. You are connected to the VPN
17. Check your IP address
Browse to https://www.myip.com/ and verify your IP and network (should be different than your ISP).
18. Disconnect
Click on the Tunnelblick icon in your menu bar and select Disconnect from the drop-down menu.
This article will show you how to secure your Microsoft Windows with Acreto Secured Connection. To create an additional layer of security we will use the OpenVPN application.
Use these steps to set up a VPN on a computer running Windows 10.
You can set up a manual OpenVPN connection by using the OpenVPN application.
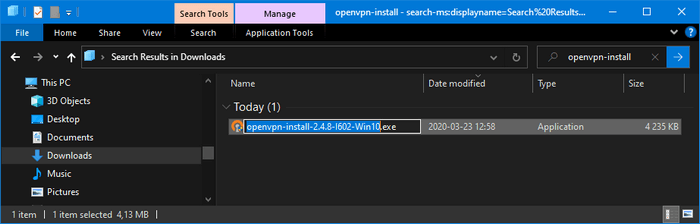
1. Download the OpenVPN GUI application
https://swupdate.openvpn.org/community/releases/openvpn-install-2.4.8-I602-Win10.exe
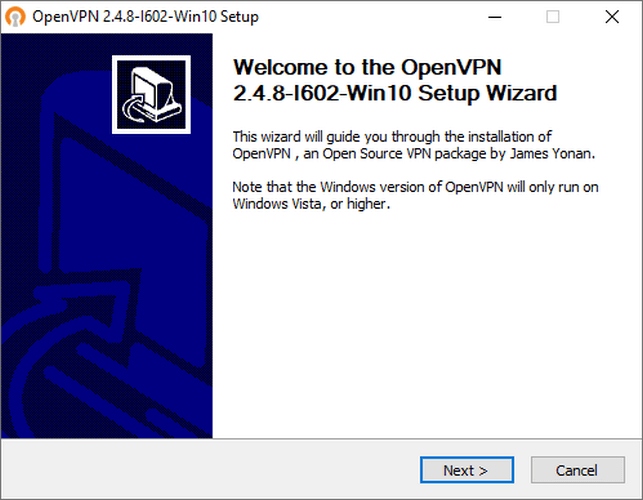
2. Open the installer file
3. Follow the setup wizard
4. Once the application is installed, download the configuration
Add a thing named laptop on Acreto Ecosystem - check how to do it

Open the laptop thing details:

Save the file as-is, or change the name to acreto-thing.ovpn
5. Go to the folder where the configurations are downloaded
6. Click and drag to select the OpenVPN configuration downloaded
7. Right-click on them and select Copy
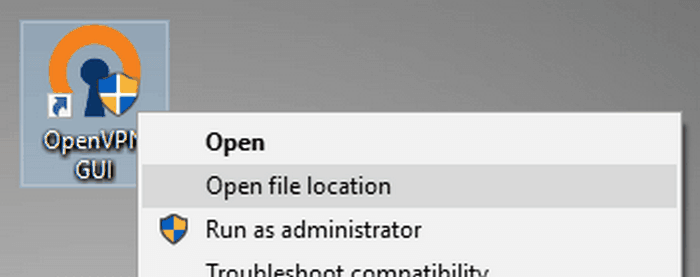
8. Find the OpenVPN config folder
Right-click the OpenVPN GUI shortcut on your desktop and select Open file location.
9. Once you’re there, click the parent OpenVPN folder in the address bar
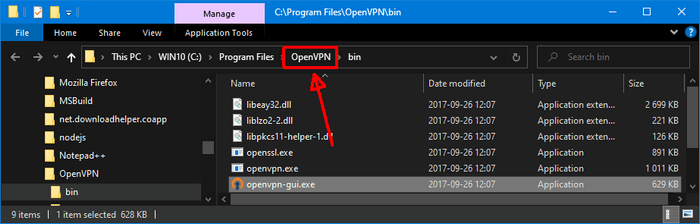
10. Extract the configuration file you need to this directory:
c:/Program Files/OpenVPN/config11. Open the OpenVPN config folder
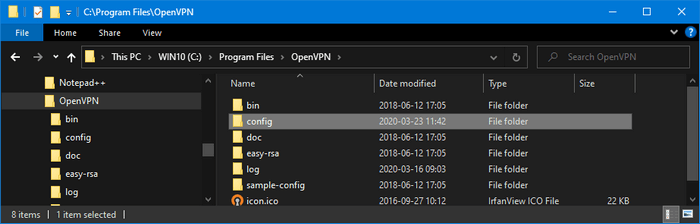
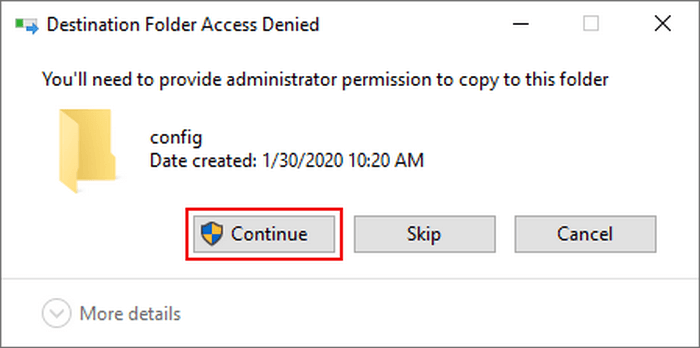
12. Paste the copied configuration files in the folder
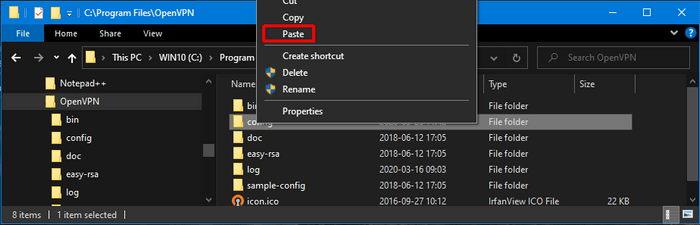
13. Click Continue to allow the files to be extracted to the folder
14. Note: How to prevent possible DNS leaks (optional)
If you are using Windows 10, add an extra line in the configuration files.
To do that, open the downloaded .ovpn configuration file with any text editor and paste this line:
block-outside-dnsDon’t forget to save the file before proceeding to the next steps of this tutorial.
15. Run OpenVPN
Now that the configuration files have been loaded into the proper folder for the application to detect them, let’s open the OpenVPN GUI app itself.
Double-click the shortcut on your desktop.
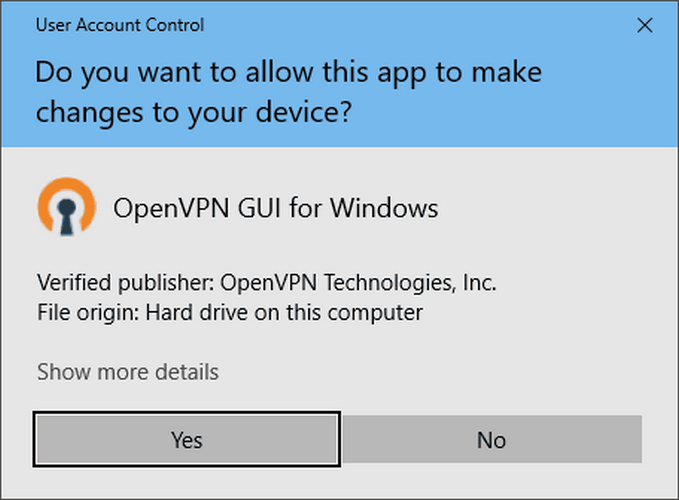
16. Allow the application to make necessary changes to your device
17. The application will start running in the system tray
It’s the area near your clock:

It might also be in the hidden system tray area:
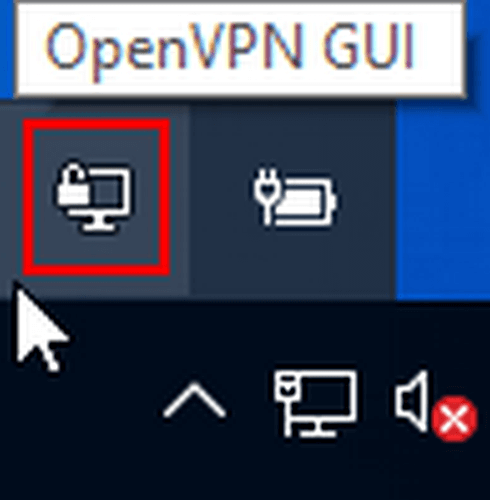
18. Right-click on the application icon, hover over one of the servers, and click Connect
19. The connection log window will pop up
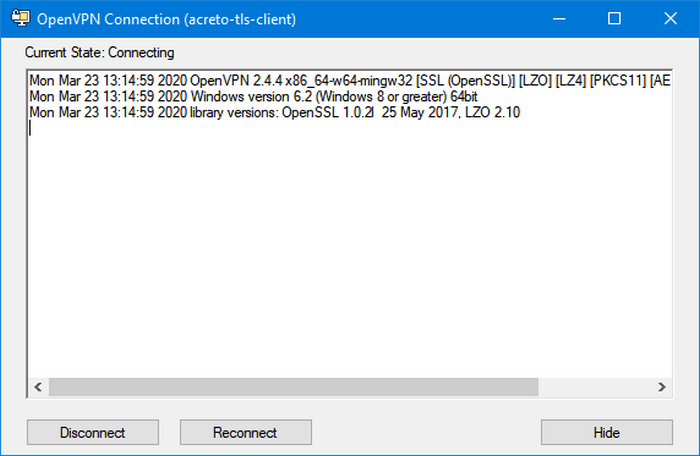
You don’t need to provide any passwords.
20. In a few seconds, the application will connect, and its window will disappear.
The system tray icon will turn green and indicate that you are connected when you hover over it:

21. Check Internet access and IP
Browse to https://www.myip.com/ and verify your IP and network (should be different than your ISP)