Quick start guide
Quick start
Thank you for choosing the Acreto platform. You will find several steps that you should follow.
Thank you for choosing the Acreto platform. You will find several steps that you should follow.
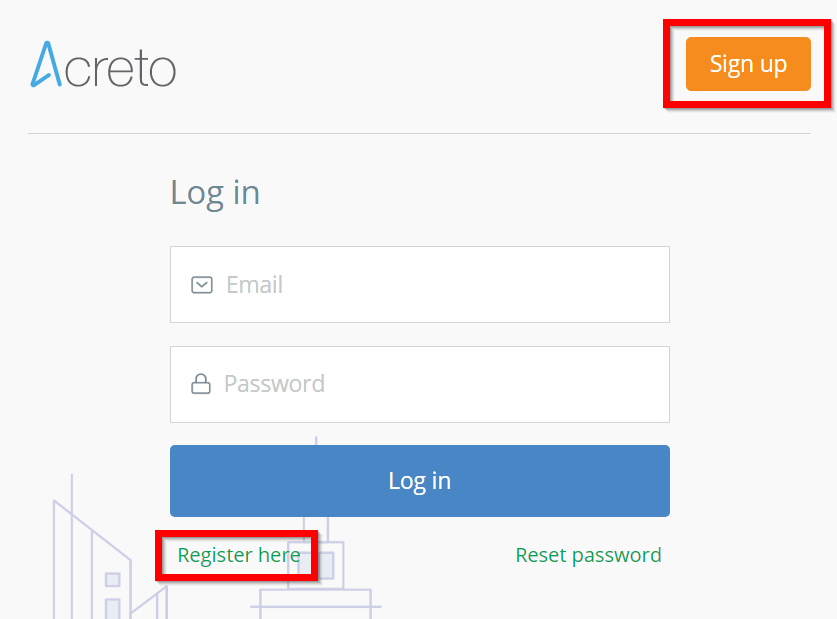
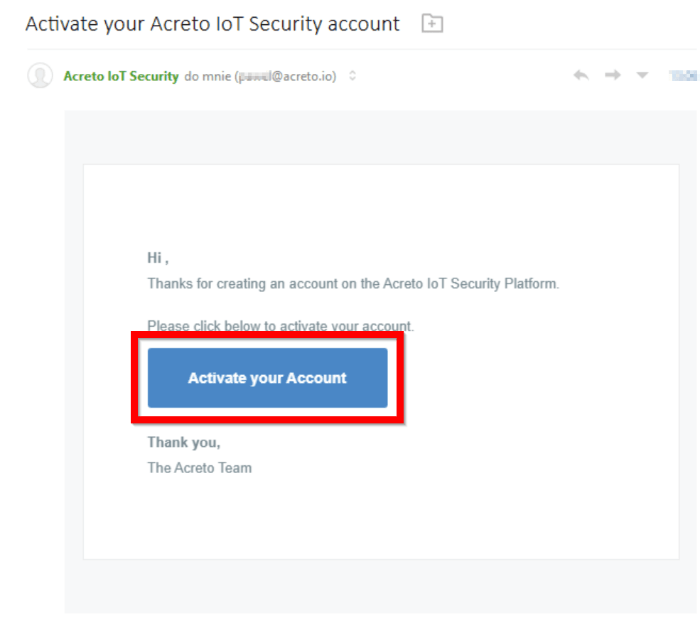
Registering and activation of the account is the first step to start using Acreto services. This article is a guide on the standard register & confirm procedure.
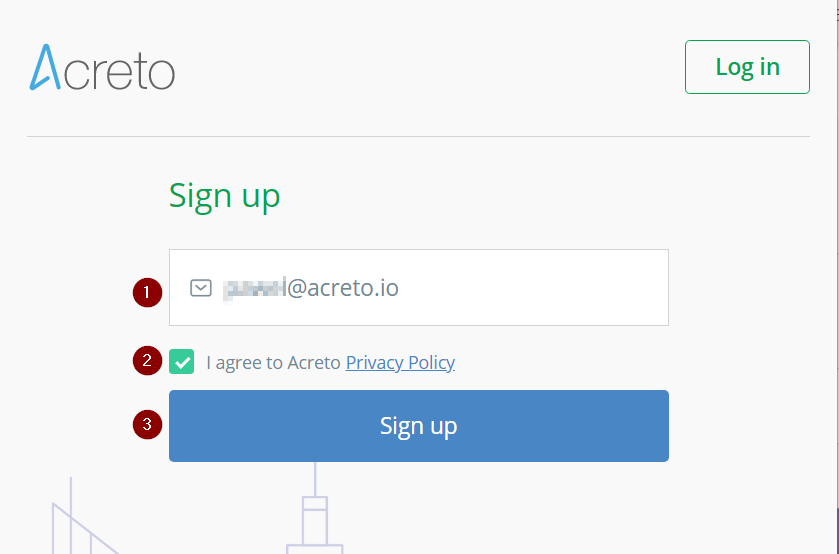
If you would like to create an account on Acreto:
If you do not receive an email from Acreto within a minute or so, check your spam folder or retype your email address in the registration form.

The Administrative Contact is the person that you want to receive all notices related to any issues with your account and all general notices regarding the Acreto platform.
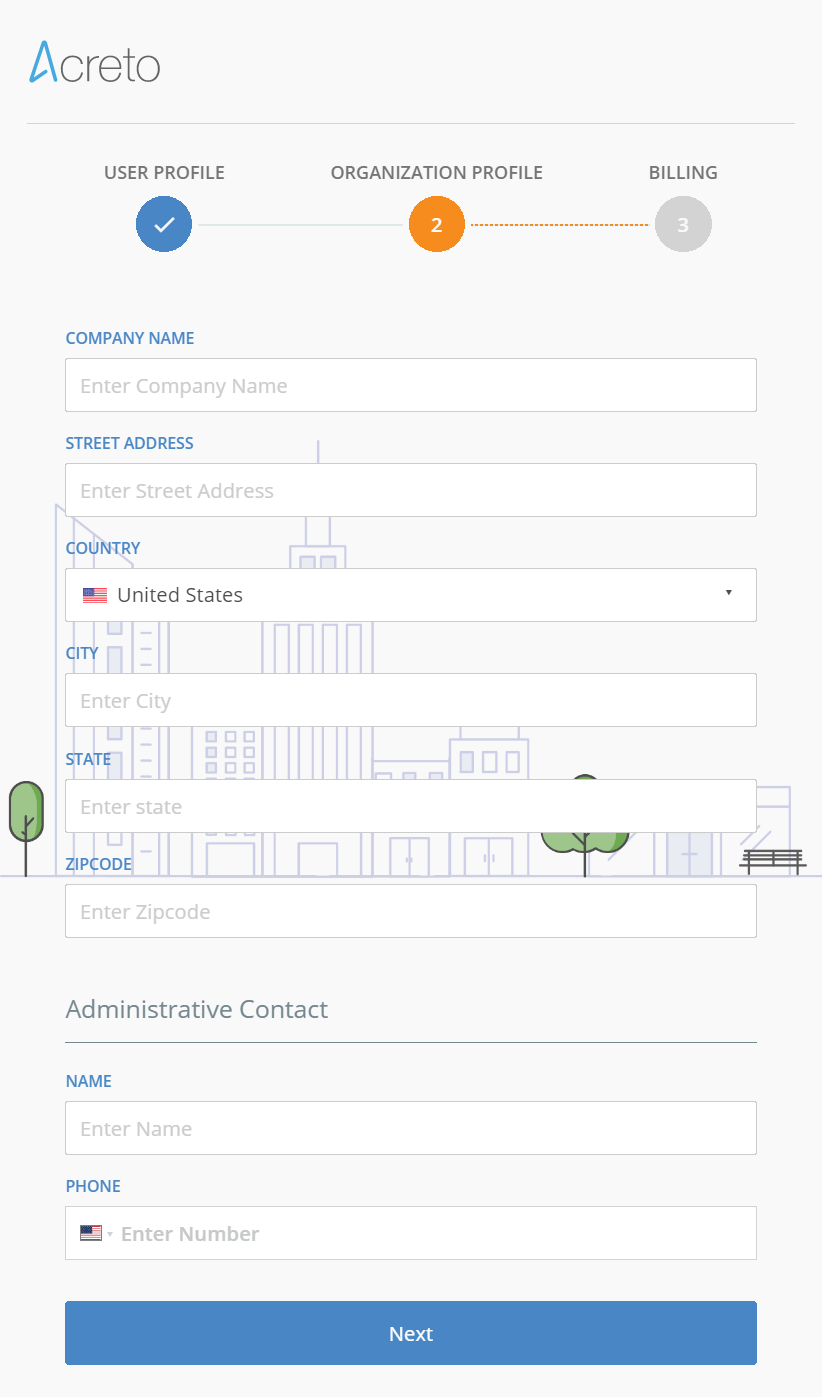
When you click the finish button your profile will be complete. You are now ready to set up your first Acreto Ecosystem
Ecosystem security is a methodology unique to the Acreto platform. It’s actually quite simple. Within your organization, there are many different departments, functions, and programs. Each of these areas contains specific applications, users, and devices that work together to execute organizational tasks. For example, your remote sales team may consist of and utilize Office 365, Salesforce, another internal pricing application, and of course, every sales team member. This is an Ecosystem. In a similar fashion, your Vendor Relations department may have 75 external suppliers that provide your organization with various goods and services. In order to be effective, each vendor must interact with your purchasing application(s). These vendors, your internal purchasing department, and every utilized purchasing application is an Ecosystem.
In addition to isolating Ecosystem members from the Internet, Acreto enables you to establish security policies at the Ecosystem level, allowing you to apply customized security policies for each Ecosystem. The right set of security policies for the sales team may very well differ from the needed security policies for the vendors.
Creating a new Acreto Ecosystem is simple:
You’re now ready to start configuring and connecting your Thing(s) and Gateway(s) into your Ecosystem!
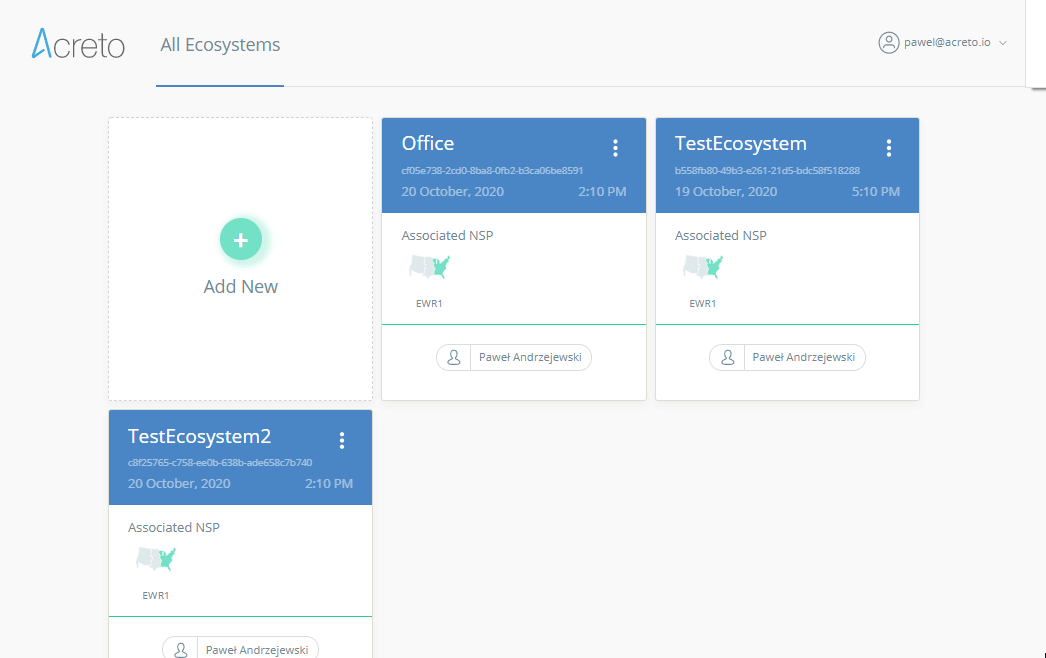
Acreto allows you to create multiple Ecosystems. You can create a separate Ecosystem for each physical location and manage them from one WEDGE panel.
To switch between existing Ecosystems:
This procedure required:
Gateway is a device that allows you to connect your local network to Acreto and secure whole network traffic and end-user devices without configuring them one-by-one. Take a look at the images below to compare standard network connection with the network secured by Acreto with the Gateway method.


Gateway may be configured in IPsec or vGateway mode. Each of these configurations may be used for different purposes and in different network structures:
To create a Gateway, you need to:

Notice: To successfully test your connectivity, you also need to create a security policy that will allow traffic to go through your device.
Set specific setting for IPsec Gateway:
Tip: To simplify testing, add IP addresses of all interfaces connected to your gateway as Local Networks (you can use /32 prefix for public interface). This will allow testing connectivity from the gateway through Acreto using ping, traceroute, and similar tools.
Set specific setting for IPsec Gateway:
Tip: To simplify testing, add IP addresses of all interfaces connected to your gateway as Local Networks (you can use /32 prefix for public interface). This will allow testing
When Gateway is ready you should configure the gateway device on your end to act as a gateway to the Acreto platform and pass traffic from your endpoints through the gateway device. connectivity from the gateway through Acreto using ping, traceroute, and similar tools.
When gateway device is created then verify Acreto secured connection.
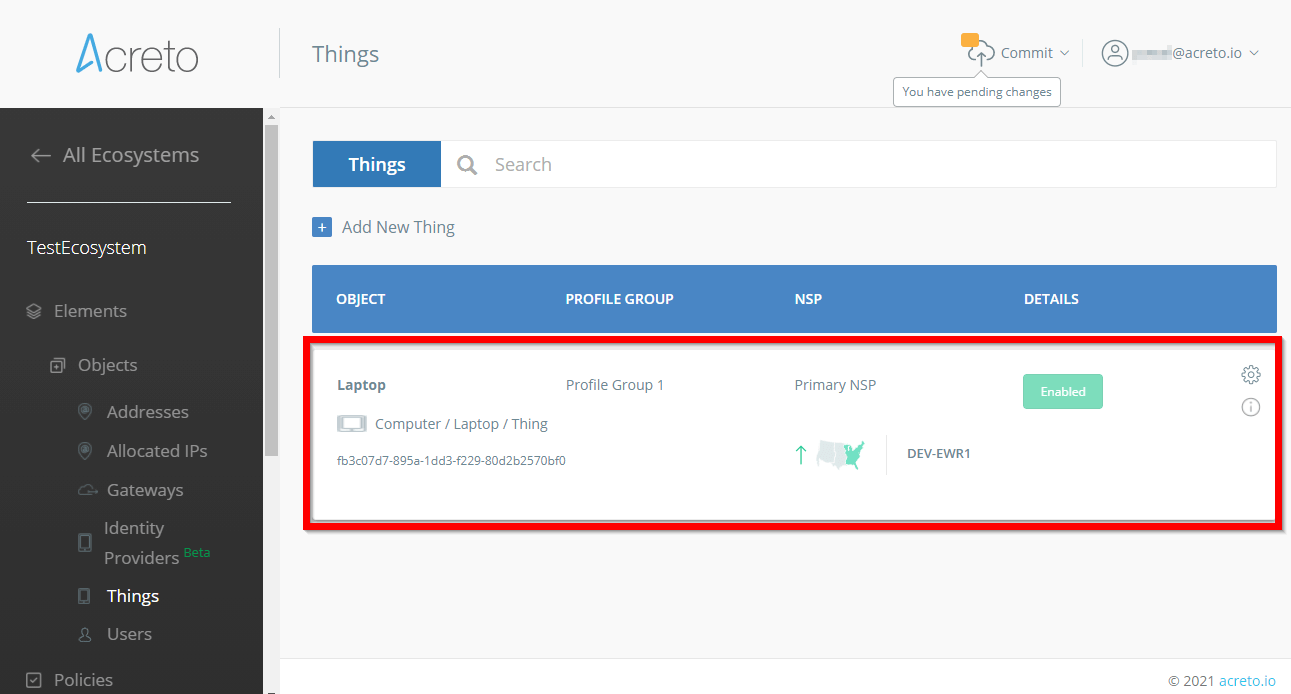
We define a Thing as any individual compute device that belongs to an Ecosystem, including servers, desktops, laptops, tablets, smartphones, IoT devices, etc. Whenever you want to connect a new device, you can create a new Thing that will represent the device in your Ecosystem.
Note: To connect your local network instead of an individual device, you should create and provision a Gateway.
Before starting this process, you should make sure that you have an Acreto account with at least one Ecosystem added to your Profile.
To add a new Thing to Acreto:
Log in to your Acreto account
Identify and select which Ecosystem you’d like to connect your Thing.
Click on the Things option in the left sidebar menu.
Once your Thing panel opens, select the Add New Thing option.
An Add Device window will appear, where you can enter information about the Thing that you want to add:
Configuration tab
Descriptors tab
The Descriptors tab contains some optional informational fields that allow you to manage your Things with ease.
Next, let’s configure your Thing to connect to the Acreto platform.
To learn how to configure your Thing(s) on a variety of platforms, please refer to the Acreto Connect documentation.
Please note: it’s recommended to test your connectivity from a different device than the one you use to manage your Ecosystem at https://wedge.acreto.net.
A security policy is a set of rules that manages the network traffic in an Ecosystem. These policies allow you to decide what traffic should be allowed from or into your added Thing(s) and which should be blocked or redirected.
Acreto follows a Zero-Trust approach. This means that all network traffic is blocked by default. To allow traffic to pass through your Ecosystem you must create some security policies, as described in the next article.
In the previous step, you configured and connected your first Thing to your Ecosystem. Now, you need to create a security policy.
A security policy is a set of rules that manages network traffic in an Ecosystem. These policies allow you to decide what traffic should be allowed, inspected, or blocked.
Acreto follows a Zero-Trust approach. This means that all network traffic is blocked by default.
To allow communications to flow through an Ecosystem, you must define a set of security policies. Without a matching security policy, the traffic is blocked.
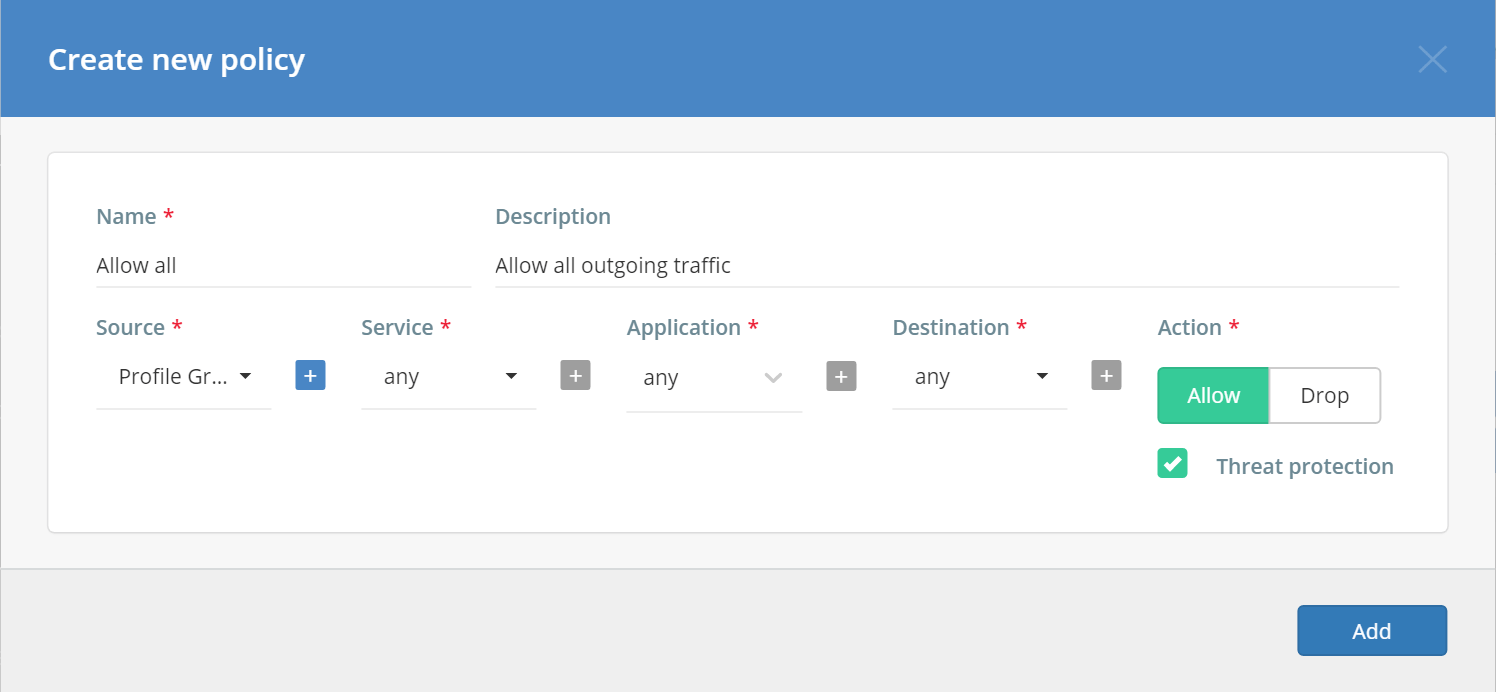
For testing purposes, we’ll guide you through the creation of an Allow all traffic security policy. To do this, you will complete an Add New Policy form as shown below.
Complete the form by entering the correct values:
Before saving, the form should look like the image below :
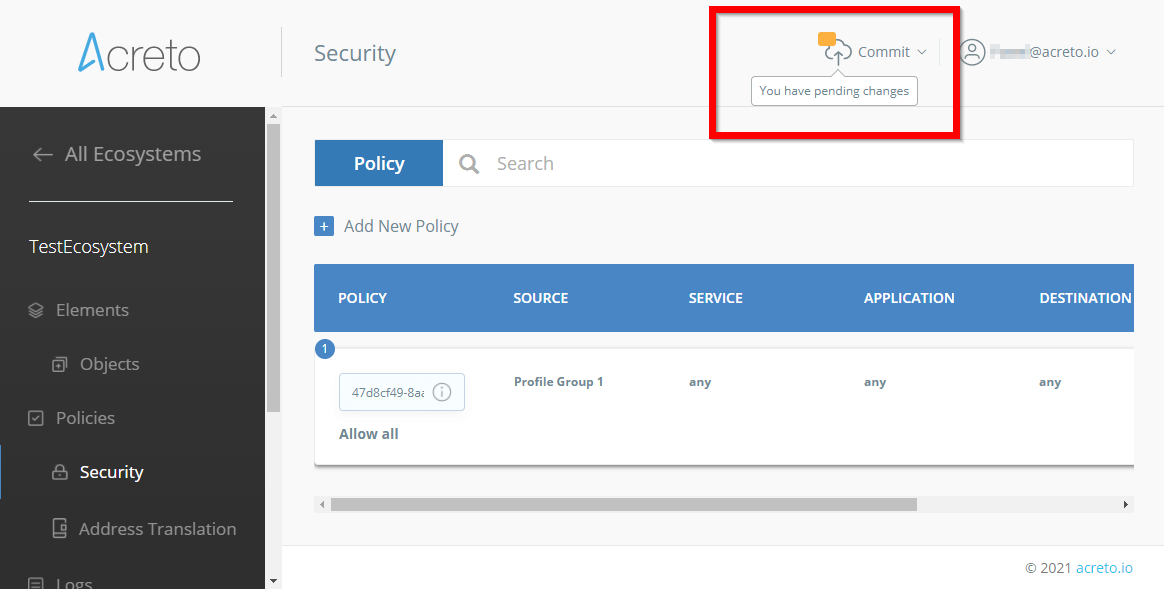
Your changes will not be applied until you Commit them!
Now, any Thing in a selected Profile group (Source) should be able to securely connect to any destination.
If you want to block Facebook from accessing your Ecosystem users, you should use the Application Control security policy. To create such a policy, fill out the Add New Policy form as shown below.

Click the Add button to save the configuration.
Once the new security policy has been added and is visible on the list, you must Commit your changes.
Your changes will not be applied until you commit them!
After committing your settings, any Facebook traffic now coming through the Ecosystem should be blocked.