WireGuard on Linux
About WireGuard
WireGuard is a modern VPN protocol that is designed to provide superior speed, security, and efficiency compared to older solutions like OpenVPN or IPsec.
How To
Prerequisites
This guide continues from the WireGuard Configuration article. Please ensure you have completed all steps in this article before proceeding.
Note that setting up WireGuard on Linux involves additional steps compared to Windows or macOS. Configuration files generated by Wedge require some modification before they can be used effectively.
Configuration on Linux
-
Check Available Interfaces: Open the terminal and type
ip ato list all available network interfaces. Note the IP address of the interface used for the internet connection. In the example below, it is10.0.2.15/24.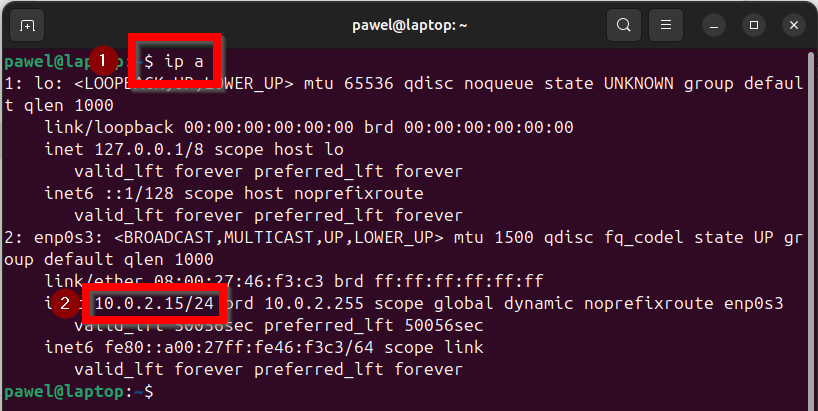
-
Install WireGuard Client: Use the package manager to install the WireGuard client:
- Ubuntu:
$ sudo apt install wireguard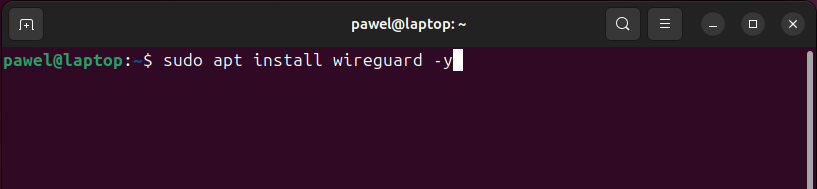
- Debian:
apt install wireguard - For other Unix-based systems, refer to the official WireGuard documentation.
- Ubuntu:
-
Log in to Acreto Portal: Access the Acreto Portal.
-
Configure the WireGuard Gateway:
- Open your Ecosystem in the Acreto Portal.
- From the left menu, select Objects > Gateways, and locate the previously created WireGuard Gateway.
- Click the gear icon to edit the gateway settings.
- Ensure the following settings are configured correctly:
- WireGuard Client Local IP address: Set this to the IP address of the Ubuntu machine (e.g.,
10.0.2.15/24). - Local Networks: Set this to a subnet mask that includes the IP address from the previous step (e.g.,
10.0.2.0/24).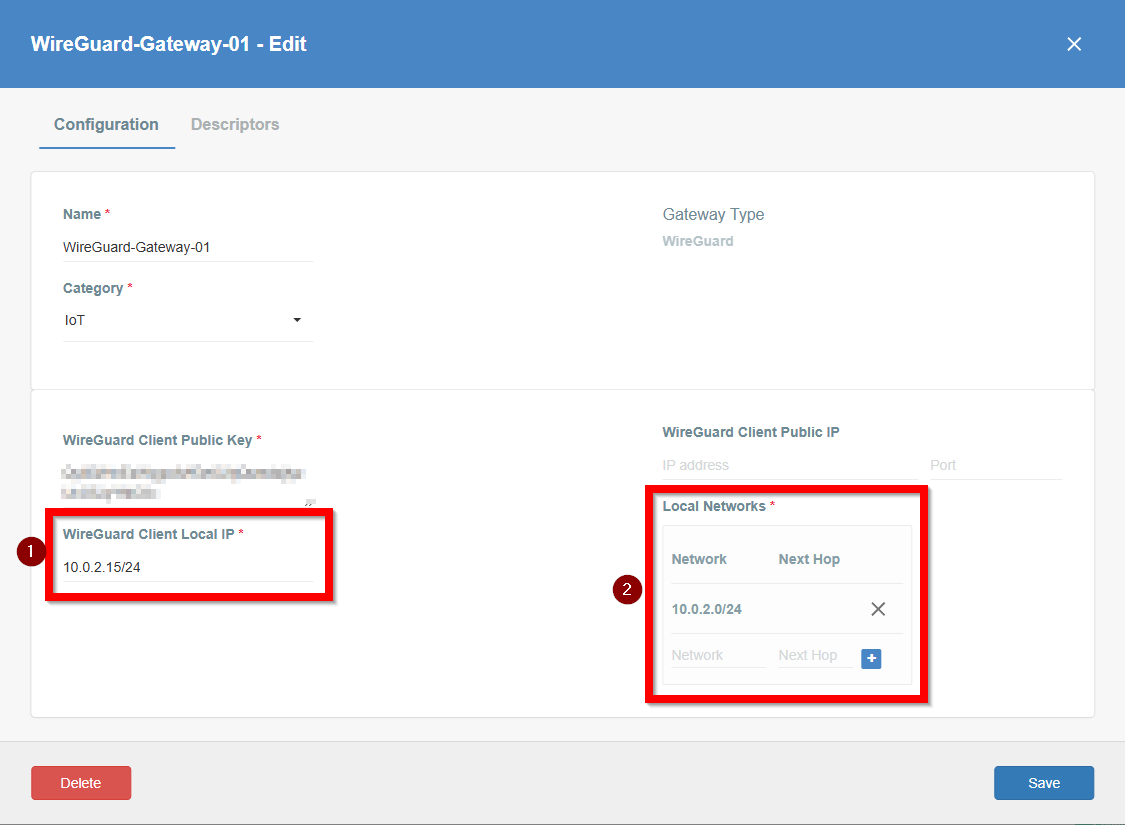
-
Save the changes and commit them to the Ecosystem.
-
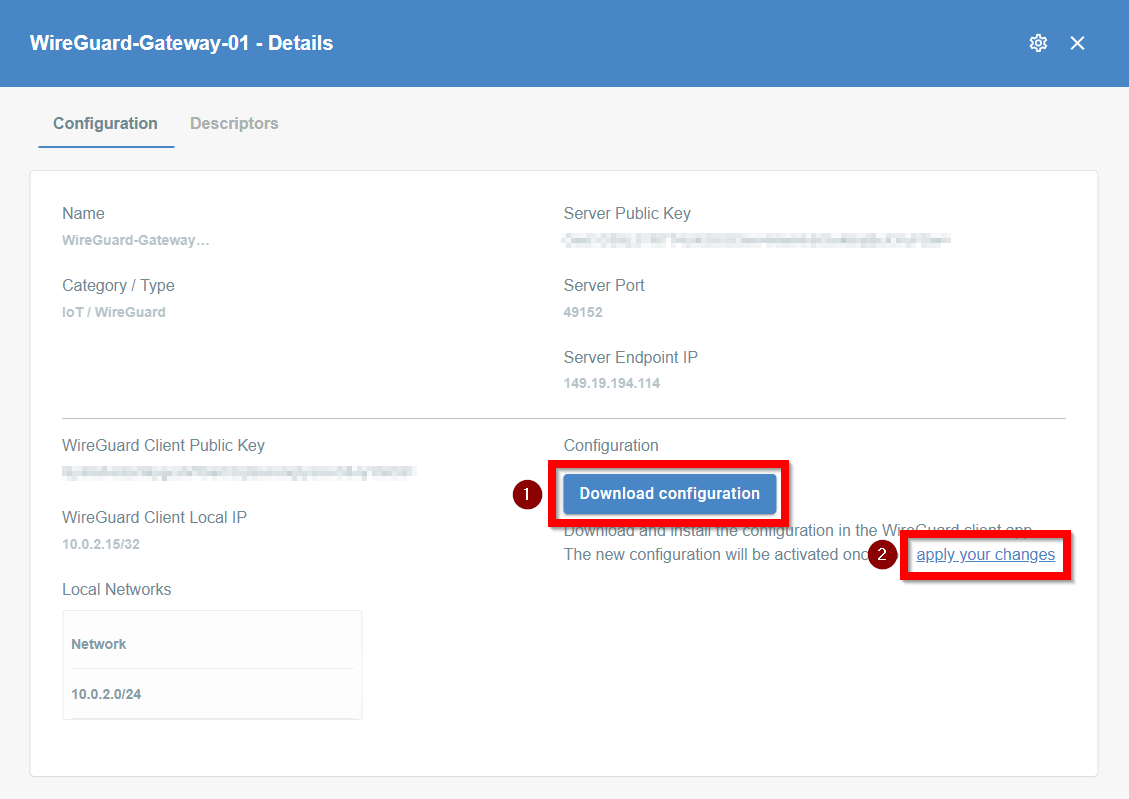
Generate Keys and Download Configuration:
- Click on the Gateway name to access the details screen.
- Click Generate new private and public key and confirm.
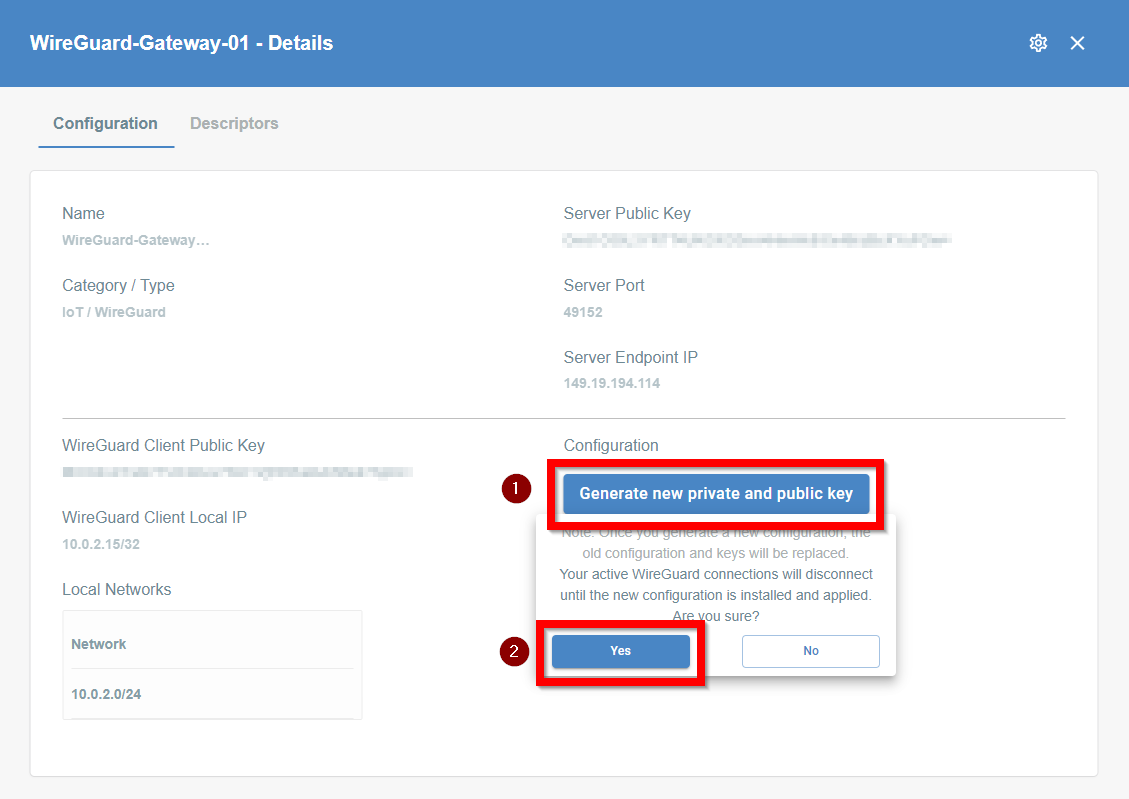
- Click the “Download configuration” button and then apply the configuration changes to the Ecosystem.
-
Transfer the Configuration File: Transfer the downloaded configuration file to your Ubuntu machine.
-
Rename and Move the Configuration File: In the terminal, rename the file and move it to the WireGuard directory:
sudo mv ./path-to-file/downloaded-file.conf /etc/wireguard/wg0.conf -
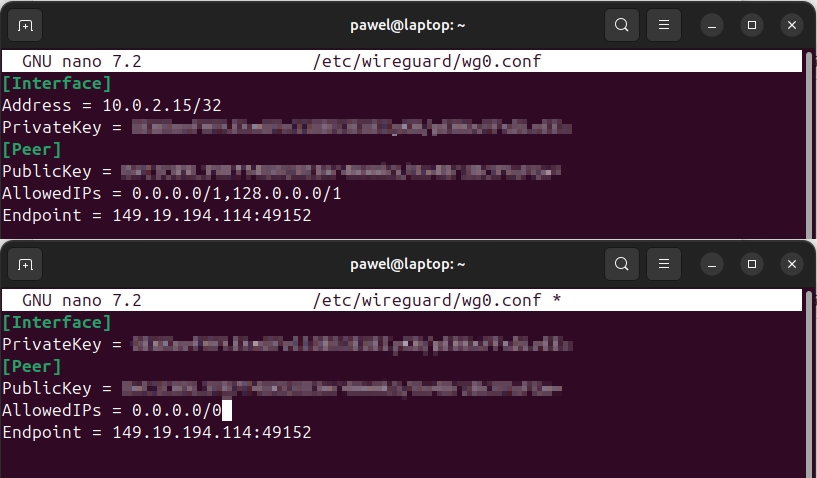
Edit the Configuration File:
- Open the configuration file using nano:
sudo nano /etc/wireguard/wg0.conf. - Modify the following fields:
- AllowedIPs: Set to
0.0.0.0/0. - Address: Remove this line and its associated value.
- Add PersistentKeepalive = 10 as a part of [Peer] configuration.
- Save and close the file.
- Open the configuration file using nano:
-
Start the WireGuard Connection: Use wg-quick to start the connection:
sudo wg-quick up wg0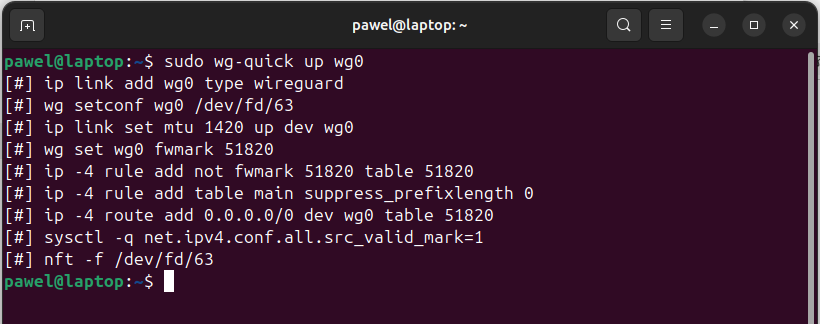
-
Check Interface Status: Verify the interface status by running:
sudo wg.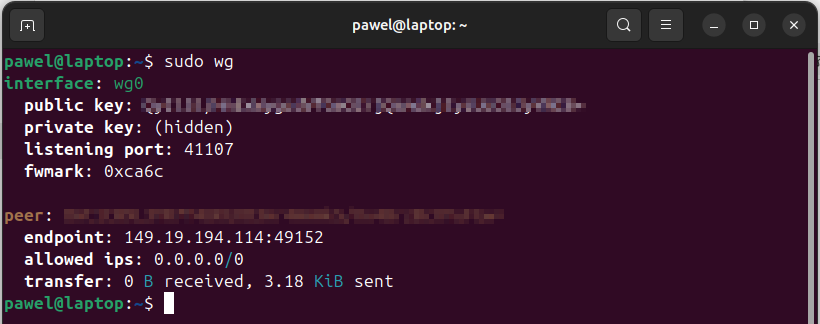
-
Enable Autostart: Enable WireGuard to start automatically upon system boot:
sudo systemctl enable wg-quick@wg0 -
Disconnect: To disconnect the VPN, type:
sudo systemctl stop wg-quick@wg0(or using the genericsudo wg-quick down wg0) -
Connect: To connect the VPN again, type:
sudo systemctl start wg-quick@wg0(or using the genericsudo wg-quick up wg0) -
WireGuard status To check the status of the VPN connection, type:
sudo systemctl status wg-quick@wg0(or using the genericsudo wgfor more details)
Upon completing these steps, your machine will be connected to the Acreto Ecosystem via the WireGuard gateway. You can verify the connection status by checking the logs available in the Acreto Portal > Logs > Gateways.
WireGuard sysctl Configuration
To enable proper routing and network functionality with WireGuard on Linux, specific sysctl kernel parameters must be set. These settings ensure IP forwarding and enhance security and performance in VPN setups.
net.ipv4.ip_forward = 1        # Enables IPv4 packet forwarding
net.ipv6.conf.all.forwarding = 1  # Enables IPv6 forwarding (if used)
Add the above lines to /etc/sysctl.conf or a custom file in /etc/sysctl.d/, then run:
sudo sysctl --systemThese parameters are crucial for WireGuard to route traffic between peers and external networks (e.g., LAN or internet).